No cancellation fees. No hassle. Book Now, Cancellation Terms
Peak ClimbingTrekking Regions+27
36 min readIsland Peak Gear List: What to Pack for Summit Day and the Full Expedition
September 19, 2026
36 min
3 views
The Island Peak gear list tends to be the second search most climbers make after confirming their booking, once the initial excitement has settled and the practical questions begin arriving. What do I actually need? Does the operator provide the technical gear? Can I rent crampons in Kathmandu, or do I need to bring my own? What goes in my summit day pack and what stays at base camp?
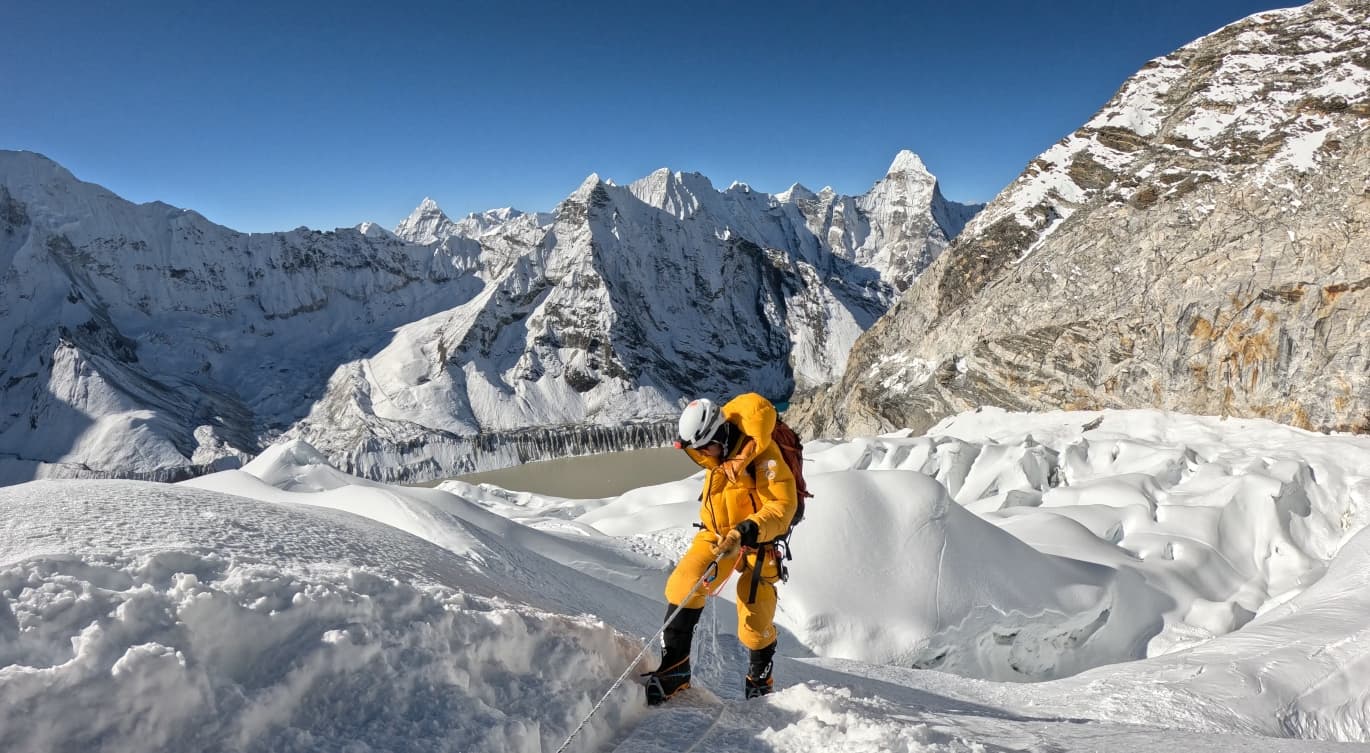
These questions matter more on Island Peak than on a standard high-altitude trek, and the reason is straightforward. Island Peak, known locally as Imja Tse, sits at 6,189 meters in Nepal's Khumbu region and is officially classified as a trekking peak by the Nepal Mountaineering Association. That classification undersells what the mountain actually demands. Summit day involves a rocky night ascent in temperatures below minus 10 degrees Celsius, a glacier crossing with crevasse navigation while roped to your climbing Sherpa, and a 100-plus-meter headwall on fixed ropes at a gradient of around 45 to 50 degrees. The summit ridge is narrow and exposed on both sides. Getting the gear wrong on any of these sections is not a minor inconvenience; it is a safety failure.
The gear list divides cleanly into two categories. There is the trekking approach equipment, covering the 8 to 10 days of walking from Lukla to base camp, much of which overlaps with any serious Khumbu trek. Then there is the technical climbing equipment specific to the glacier and headwall sections above the crampon point at around 5,800 meters. Both categories matter, but the technical section is where first-time climbers most commonly arrive underprepared, either by assuming the operator provides everything, by renting gear without testing fit, or by bringing items that are not rated for the temperatures and demands above 6,000 meters.
This guide covers the full Island Peak gear list from base layer to carabiner, explains what each item is used for and why it is necessary, addresses the buy versus rent decision for each category, and closes with a practical summary of what goes in the summit day pack versus what stays at camp. Everything here is based on direct expedition experience on the mountain across multiple seasons.
Island Peak Gear Checklist at a Glance
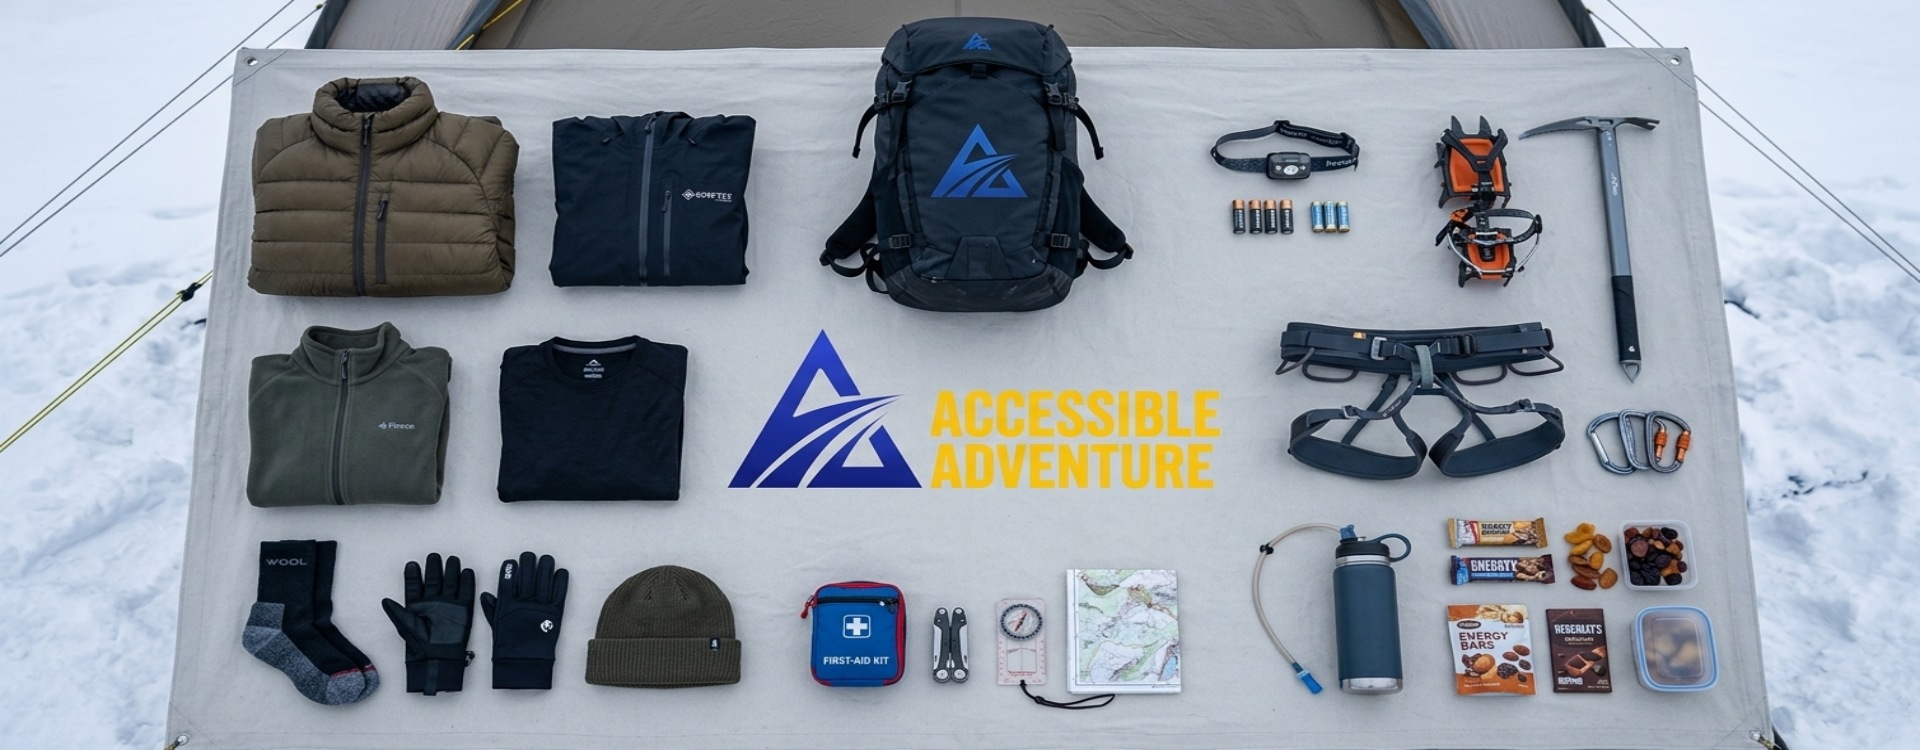
Your full Island Peak packing list and climbing checklist, 40+ items across six categories, with buy-vs-rent guidance for each. Full explanations for the "why" behind every item are in the sections below; this table is for a fast pass before you pack.
Technical Climbing Equipment
| Item | Source | Note |
|---|---|---|
| Mountaineering boots | Buy - never rent | Break in fully before departure |
| Crampons, 12-point | Confirm w/ operator, or rent in Chhukung | Fit-test on your own boots first |
| Ice axe, 60-70 cm | Confirm w/ operator, or rent in Chhukung | For balance, self-arrest, descent |
| Climbing harness | Rent OK, or buy | Test fit over your down jacket at home |
| Ascender (jumar) | Confirm w/ operator, or rent | Practice clipping in gloves beforehand |
| Descender/belay device | Confirm w/ operator, or rent | ATC-style or figure-8 |
| Climbing helmet | Confirm w/ operator, or rent | Under 400g; check suspension fit |
| Locking carabiners ×2-3 | Buy | Screwgate/auto-lock, major connector size |
Clothing System
| Item | Source | Note |
|---|---|---|
| Base layer top & bottom ×2 sets | Buy | Fresh set for summit day |
| Fleece mid layer | Buy | Zip-through collar for venting |
| Down jacket, -15°C / 800-fill+ | Buy | Loaner jackets aren't a substitute |
| Shell jacket & trousers | Buy | Gore-Tex or equivalent |
| Liner gloves | Buy | For dexterity tasks |
| Outer insulated gloves/mittens ×2 pairs | Buy | Rated to -20°C or below; pack a spare |
| Warm hat (fleece/merino) | Buy | Worn under the helmet |
| Balaclava or buff/neck gaiter | Buy | Covers nose and chin pre-dawn |
| Liner socks + insulated socks | Buy | Test full sock-boot-crampon fit beforehand |
| Gaiters | Buy | High-calf style for glacier sections |
Packs
| Item | Source | Note |
|---|---|---|
| Main duffel, 70-80L | Buy | Porter-carried; keep to 12-15kg |
| Summit daypack, 25-35L | Buy | Sternum strap + hip belt; under 8kg loaded |
Sleeping & Camp Gear
| Item | Source | Note |
|---|---|---|
| Sleeping bag, -20°C comfort rating | Confirm w/ operator, or rent | Check actual rating when handed over |
| Insulated sleeping pad | Confirm w/ operator | Carry a foam backup |
| Camp shoes or down booties | Buy | Lets boots air out at camp |
Health, Safety & Practical Items
| Item | Source | Note |
|---|---|---|
| Headlamp + 2 spare battery sets | Buy | 200+ lumens; keep spares warm overnight |
| SPF 50+ sunscreen & SPF lip balm | Buy | Reapply during stationary periods |
| Glacier goggles (Category 4) + backup sunglasses | Buy | Full side coverage required |
| Insulated water bottles ×2 (1.5L each) | Buy | Not a hydration bladder : tubes freeze |
| High-energy snacks, 10-14 hrs worth | Buy | Gels, bars, nuts, chocolate |
| Personal medication & first aid kit | Buy | Diamox (if prescribed), analgesics, blister kit |
| Pulse oximeter | Buy | Useful from Dingboche onward |
Electronics
| Item | Source | Note |
|---|---|---|
| Phone / camera + spare battery | Buy | Keep batteries body-warm |
| Power bank, 20,000mAh+ | Buy | Charge fully at Dingboche |
| GoPro or action camera (optional) | Buy | Handles cold better than a phone |
Leave at Base Camp: Not Needed on Summit Day
| Item | Note |
|---|---|
| Trekking poles | Widely rentable in Kathmandu; not usable above the crampon point |
| Extra clothing, books, laptop | Stays in the main duffel |
Understanding What Island Peak's Terrain Demands of Your Gear
Before walking through the list, it helps to understand why specific items are needed by picturing exactly where and how they are used. The gear list is not arbitrary; each item exists because something on the route requires it.
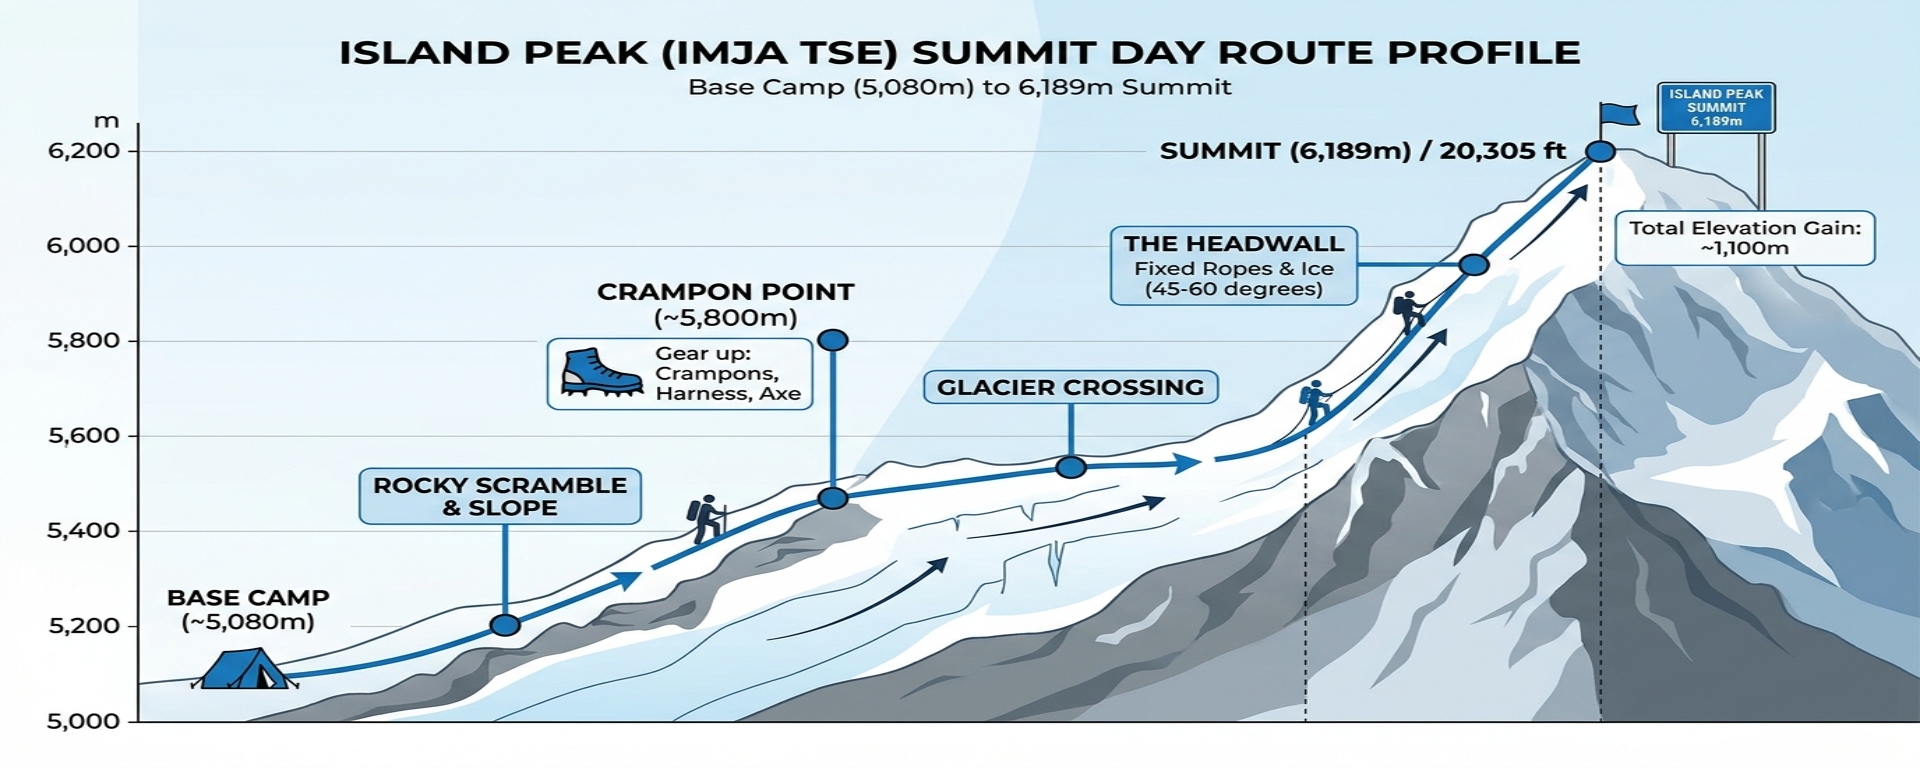
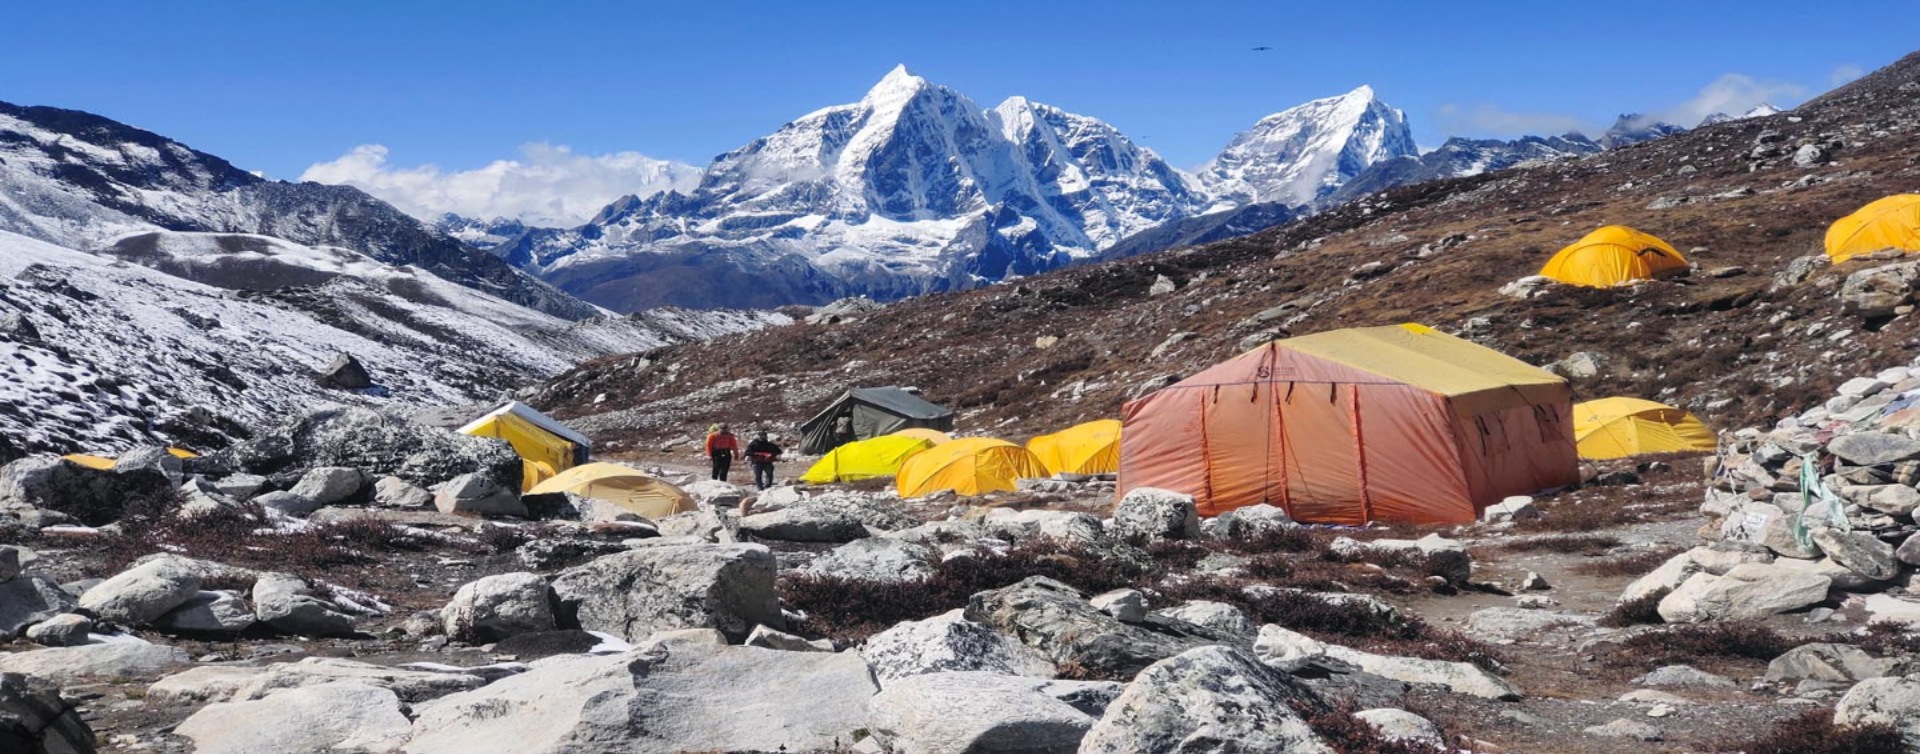
Summit day typically begins between 1 and 3 AM from base camp (5,100 meters) or from high camp (5,500 meters). The first section to the crampon point at roughly 5,800 meters is a steep, rocky scramble over scree and loose ground covered in darkness with headlamps. Temperatures at this hour regularly sit between minus 10 and minus 20 degrees Celsius, factoring in wind chill. Some guides allow trekking boots for this section, but most experienced guides recommend wearing mountaineering boots from base camp to avoid a difficult boot change in the dark at the glacier edge.
From the crampon point, everything changes. Crampons are fitted, harnesses are checked and clipped in, and the team ropes up for the glacier traverse. The glacier on Island Peak's upper section contains crevasses and snow bridges that require careful navigation, which is the guide's responsibility but which means the rope system must be fully functional and properly adjusted before stepping onto the ice.
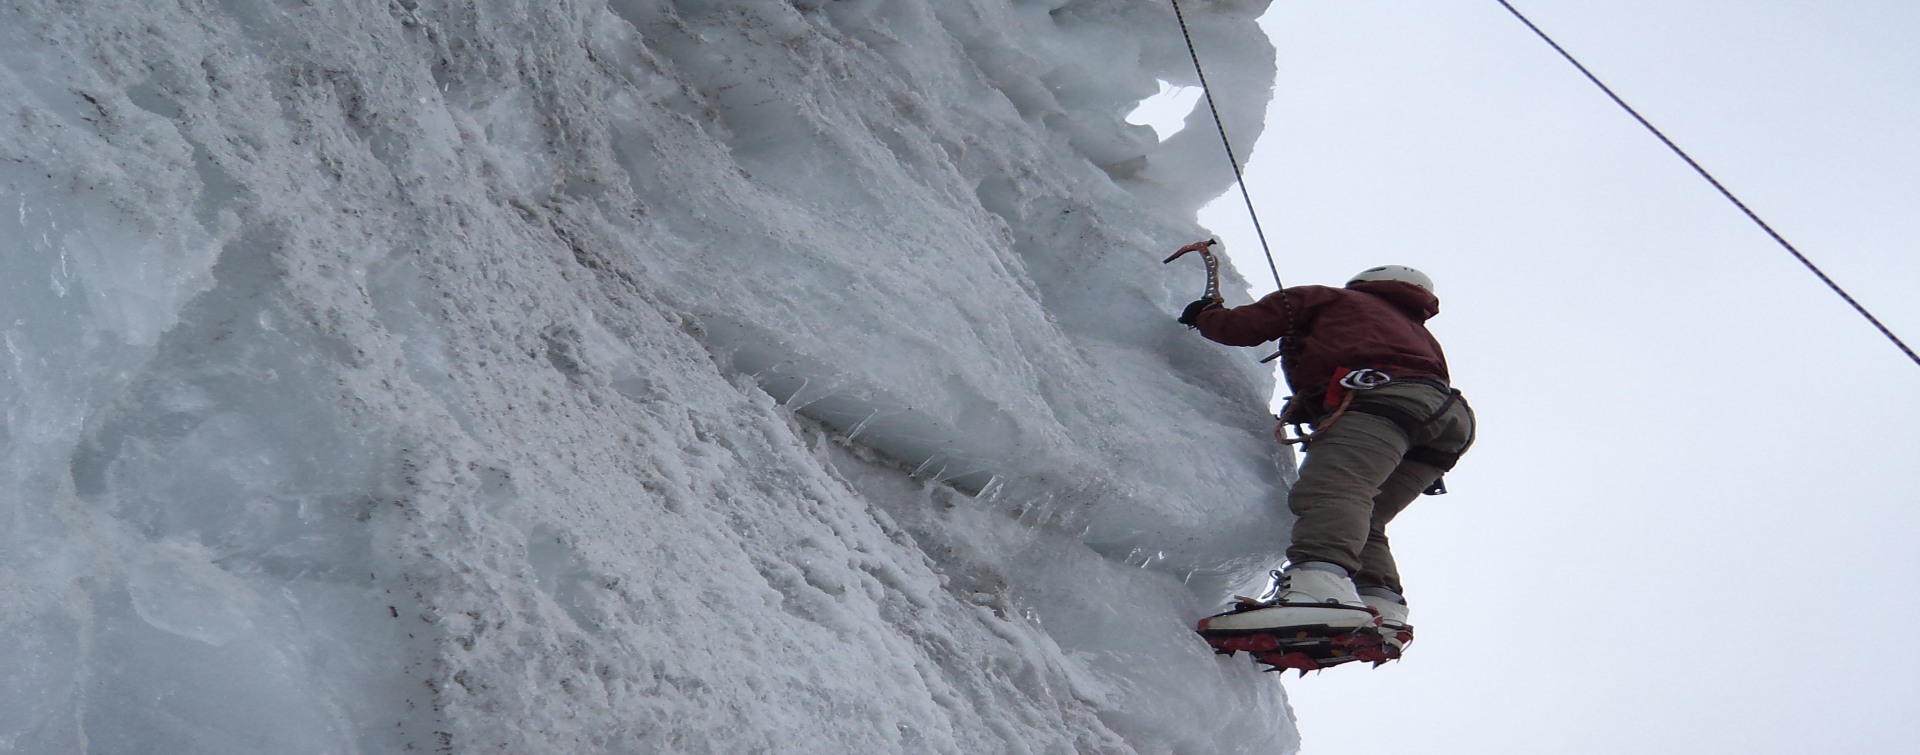
The technical crux is the headwall: a snow and ice face of roughly 100 to 150 meters rising at a gradient of approximately 45 to 50 degrees to the summit ridge. Climbing Sherpas set fixed ropes on the headwall before each team's attempt. Climbers clip their ascender (jumar) to the fixed rope and move upward methodically, one step at a time. The ascender is the device that makes upward progress on this section both possible and safe. Beyond the headwall, the summit ridge requires careful crampon placement and controlled movement before the wide, flat summit plateau opens up at 6,189 meters.
The descent reverses the route. A descender or belay device is used for the controlled rappel down the headwall on the fixed ropes. Back across the glacier and down to base camp, the total summit day duration is typically 10 to 14 hours. Understanding this sequence makes every item on the gear list make sense.
Technical Climbing Equipment: The Non-Negotiable List
This is the most important section of the Island Peak gear list. These items are used specifically on the glacier and headwall sections above the crampon point, and there is no acceptable substitute or workaround for any of them.
Mountaineering Boots
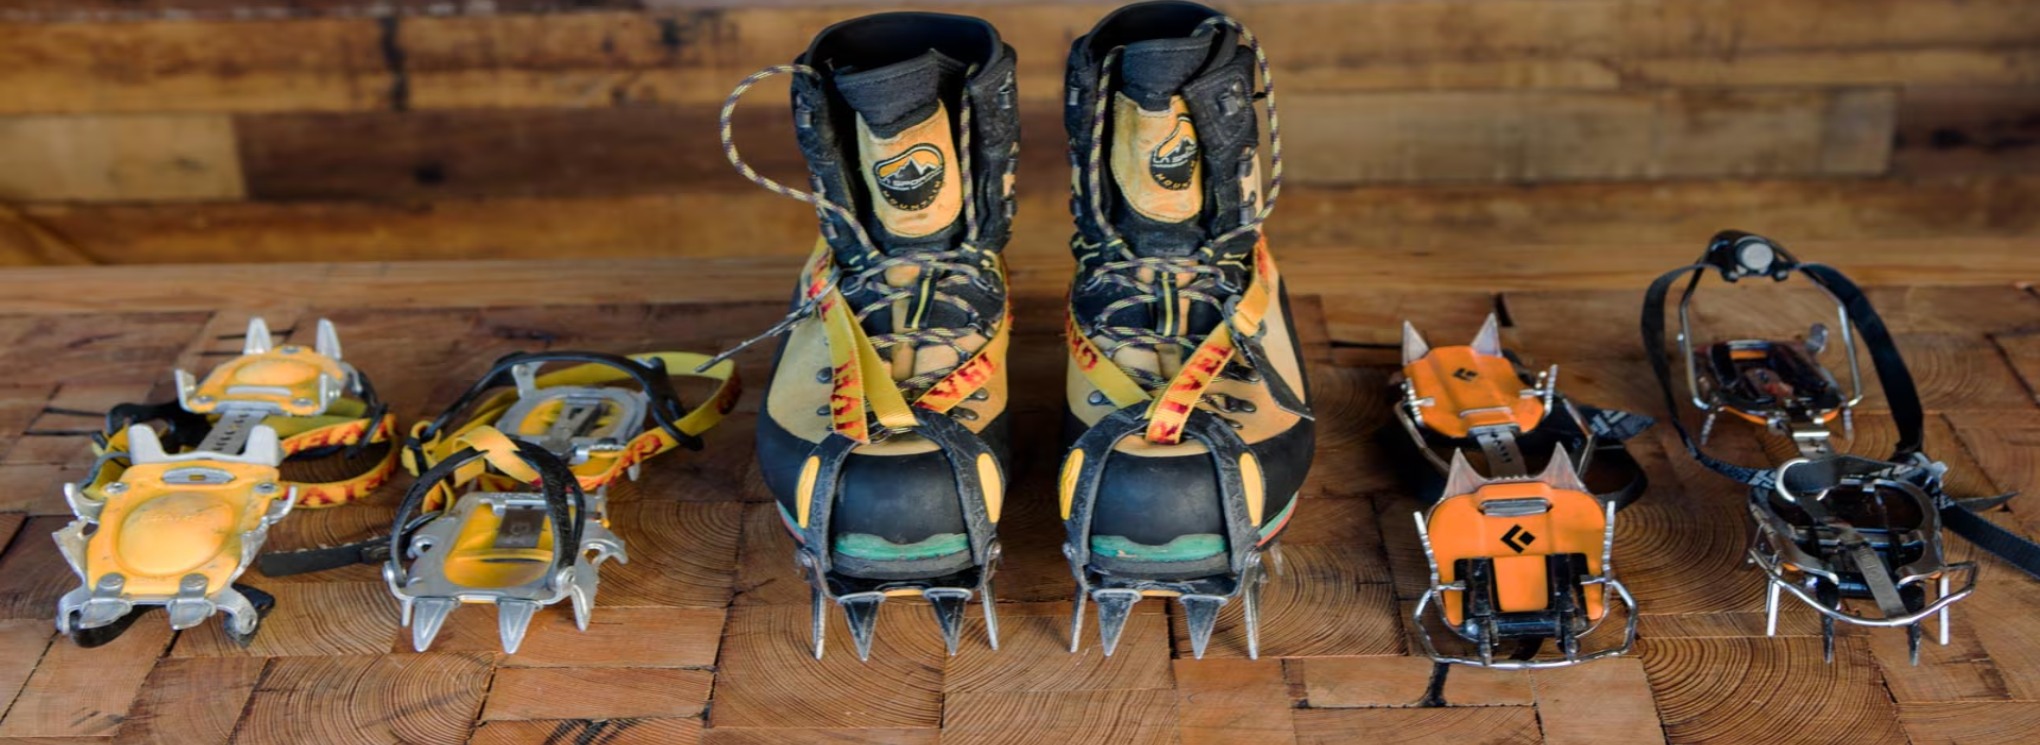
Mountaineering boots are the single most important item on the Island Peak gear list, and the one most directly linked to summit success and safety. Standard trekking boots do not work above the crampon point for three reasons: they are not rigid enough to front-point on steep ice, they are not warm enough for the temperatures encountered above 5,800 meters, and most do not accept mountaineering crampons in a secure binding.
The boots needed are either insulated double-boots or modern single-piece mountaineering boots with a stiff shank and compatible crampon binding. Models in the La Sportiva Nepal range, Scarpa Phantom series, and comparable options from Salewa and Mammut are appropriate for Island Peak's demands. Whatever model is chosen, the boots must be thoroughly broken in before the expedition. This cannot be overstated: the most frequently cited cause of both summit failure and cold-related injury on Island Peak is inadequate boot selection, followed closely by boots that were never worn before summit day.
For those renting rather than buying: go to the shop in Kathmandu on the first day in the city, bring the socks you plan to wear on summit day, and spend time in the boots in the shop and on the street. Do this on arrival day, not the evening before the climb. A crampon fitting on top of boots that have never been worn is a problem best prevented at sea level.
Crampons
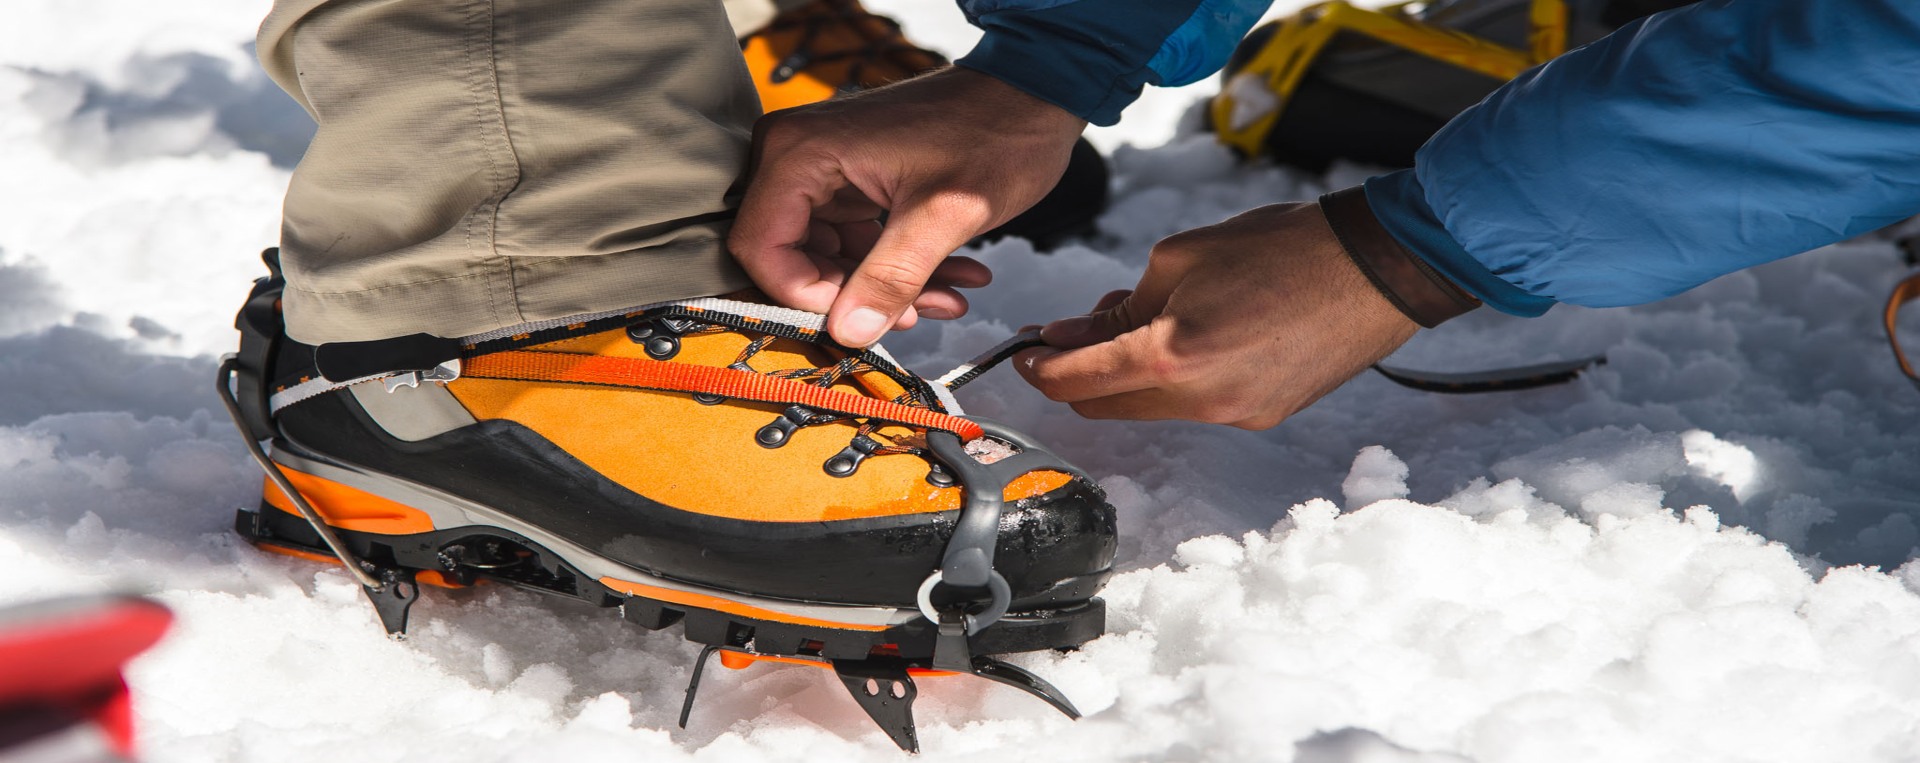
12-point mountaineering crampons are required for Island Peak's upper section. The crampon must fit the boot precisely: a binding that sits crooked, loosens under load, or fails to lock cleanly on the heel bail is a significant hazard on the headwall. If the operator includes crampons in the group equipment (many do), confirm this before making independent arrangements. If renting, bring your boots to the shop and test the fit hands-on rather than selecting by boot size alone.
Automatic (step-in) or semi-automatic bindings that attach front and rear to a rigid-soled boot are the most secure option for this kind of terrain. Strap bindings, while more universal, require more frequent checking and adjustment during the climb. Walk around in fitted crampons in the shop; the binding should feel solid and show no movement when the foot is twisted or lifted.
Ice Axe
A standard mountaineering ice axe of 60 to 70 centimeters is used for balance on the glacier approach, as a self-arrest tool if a slip occurs on the descent, and as a general stability aid on steep sections. The headwall itself is climbed on fixed ropes using the ascender rather than ice axe technique, but the axe is carried throughout the summit day and is an essential safety item on the glacier and descent sections.
Self-arrest technique should be understood before arriving in Nepal. The base camp training day covers gear familiarisation and rope skills but is not the right moment to learn self-arrest from scratch. A few practice sessions on a steep snowy slope before departure, even at a ski resort or training center, makes a meaningful difference to confidence and response time if a slip occurs.
Climbing Harness
A sit harness is required for the glacier traverse and headwall sections. The harness connects climbers to the rope team and to the fixed ropes, and it must fit comfortably over all clothing layers worn on summit day. Testing harness fit over a down jacket and insulated trousers at home before the trip reveals whether the harness waist loop and leg loops can be adjusted to accommodate the extra bulk. A harness that fits neatly over a thin fleece but cuts painfully into the hip bones when worn over a down jacket is a problem that becomes very obvious on the headwall.
Ascender (Jumar)
The ascender, commonly called a jumar, is the mechanical device that clips onto the fixed rope and slides freely upward while locking against downward force. On Island Peak's headwall, the ascender is how virtually every climber moves up the fixed rope: clip in, push the device up with one hand, step up with the feet, repeat. This is the technique for the most technical section of the entire climb.
Handling an ascender before arrival makes the headwall significantly less stressful. Thread a rope through one at home, understand how it locks and releases, and practice clipping and unclipping with the gloves you plan to wear on summit day. Cold fingers at 6,000 meters in the dark make unfamiliar equipment much harder to operate. Many operators include an ascender in the group equipment; confirm before the trip.
Descender or Belay Device
The descent from the headwall is made on fixed ropes using a descender for controlled rappelling. An ATC-style belay device or a figure-8 is appropriate for this section. The guide manages the rappel setup and supervises the descent, but understanding how the device operates avoids confusion at the top of the headwall when the team is cold, tired, and motivationally committed to losing altitude as quickly as safely possible.
Helmet
A climbing helmet is required from the crampon point onward. Rockfall from other climbers on the headwall above and from the headwall margins themselves makes a helmet a genuinely protective item rather than a procedural formality. Modern lightweight climbing helmets (Black Diamond Half Dome, Petzl Boreo, and comparable options) weigh under 400 grams and pack into a daypack without significantly affecting the load.
Carabiners and Connectors
Two to three locking carabiners are needed for connecting the ascender, clipping into safety anchors on exposed sections, and carrying spare connections. Standard non-locking carabiners are not suitable for the critical load-bearing connections on the fixed rope system. Screwgate or auto-locking carabiners in the major connector size (not mini or keylock styles) are the appropriate specification.
The Clothing System: What to Wear on Summit Day
Temperature management on Island Peak's summit day is more complex than on a standard high-altitude trek because effort level varies dramatically between phases. The rocky scramble to the crampon point generates significant body heat. The glacier traverse is slower and colder. The headwall produces high exertion again. The summit is exposed and windy. The clothing system needs to handle all of these transitions without requiring a complete change of layers at each stage.
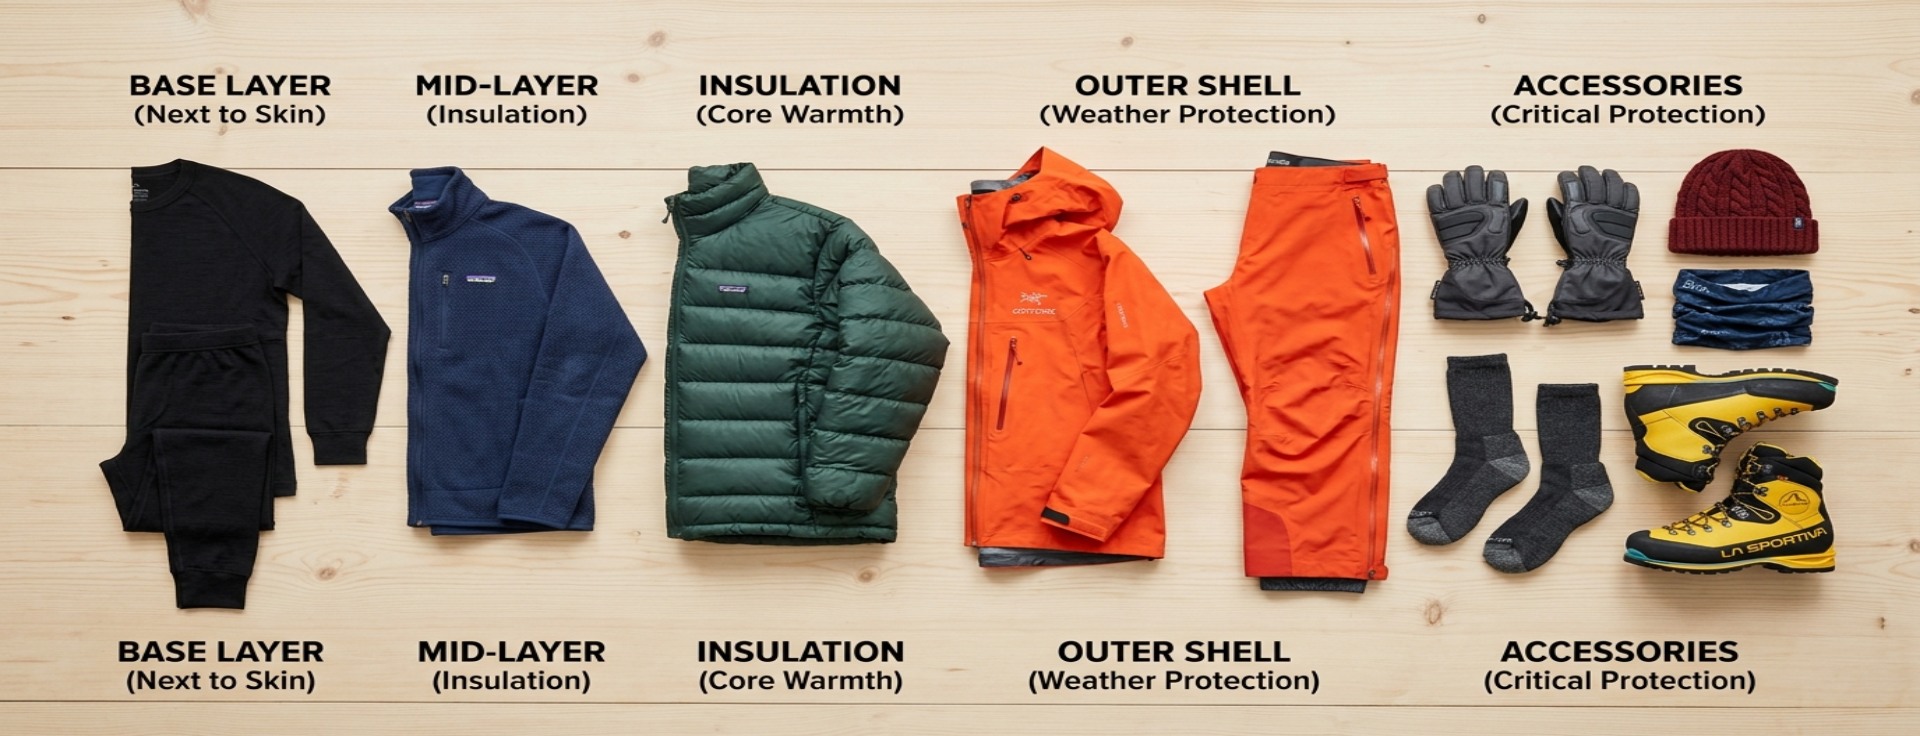
Base Layer: The Foundation
Moisture-wicking thermal base layers in both top and bottom form the foundation of the clothing system. Merino wool and high-performance synthetic fabrics (Polartec Power Dry and equivalents) are both appropriate choices. The base layer manages sweat from the high-exertion sections and provides an insulating layer that retains warmth when movement slows. Bring two complete sets so summit day uses fresh base layers after the approach days. A base layer that has been worn for three consecutive days already saturated with moisture from previous trekking days provides meaningfully less insulation than a clean, dry set.
Mid Layer: Active Insulation
A warm fleece jacket over the base layer handles the lower approach sections and active climbing phases where body heat makes a full down jacket impractical. A zip-through collar allows rapid temperature regulation during exertion. The mid layer stays on throughout the climb, with the down jacket added or removed in response to activity level and section temperature.
Down Jacket: Critical Insulation
A down jacket rated to minus 15 degrees Celsius or below is the critical insulating layer for stationary periods, the summit, and any rest stops where the body cools quickly. The down jacket goes on at the crampon point when the pace slows to a deliberate glacier-crossing speed and the temperature impact of standing still becomes acute. On the headwall, where exertion is high, many climbers stow the down jacket in the daypack to prevent overheating; it goes back on immediately at the summit.
An 800 fill-power down or higher offers the best warmth-to-weight ratio for summit day. A jacket that compresses into a reasonable packed size and can be stowed in the top of the daypack without dominating the load is preferable to a bulkier option at this weight class. The collar should be high enough to cover the base of the neck when zipped, which is the most significant heat-loss point in cold, windy conditions.
Outer Shell: Windproof and Waterproof
A Gore-Tex or equivalent waterproof and windproof shell jacket and matching trousers form the outer protection layer worn over everything else. The shell blocks wind and precipitation while allowing moisture vapor to pass outward. On summit day the shell is worn throughout, over all underlying layers, and the trouser shell protects the legs from wind chill on the exposed sections of the climb. Insulated one-piece summit suits that combine mid and outer layers are another option; they are warm and eliminate the layering decision on summit day, but a separate shell allows more flexibility across the varying temperature zones of the approach and descent.
Gloves: The Area Most Climbers Get Wrong
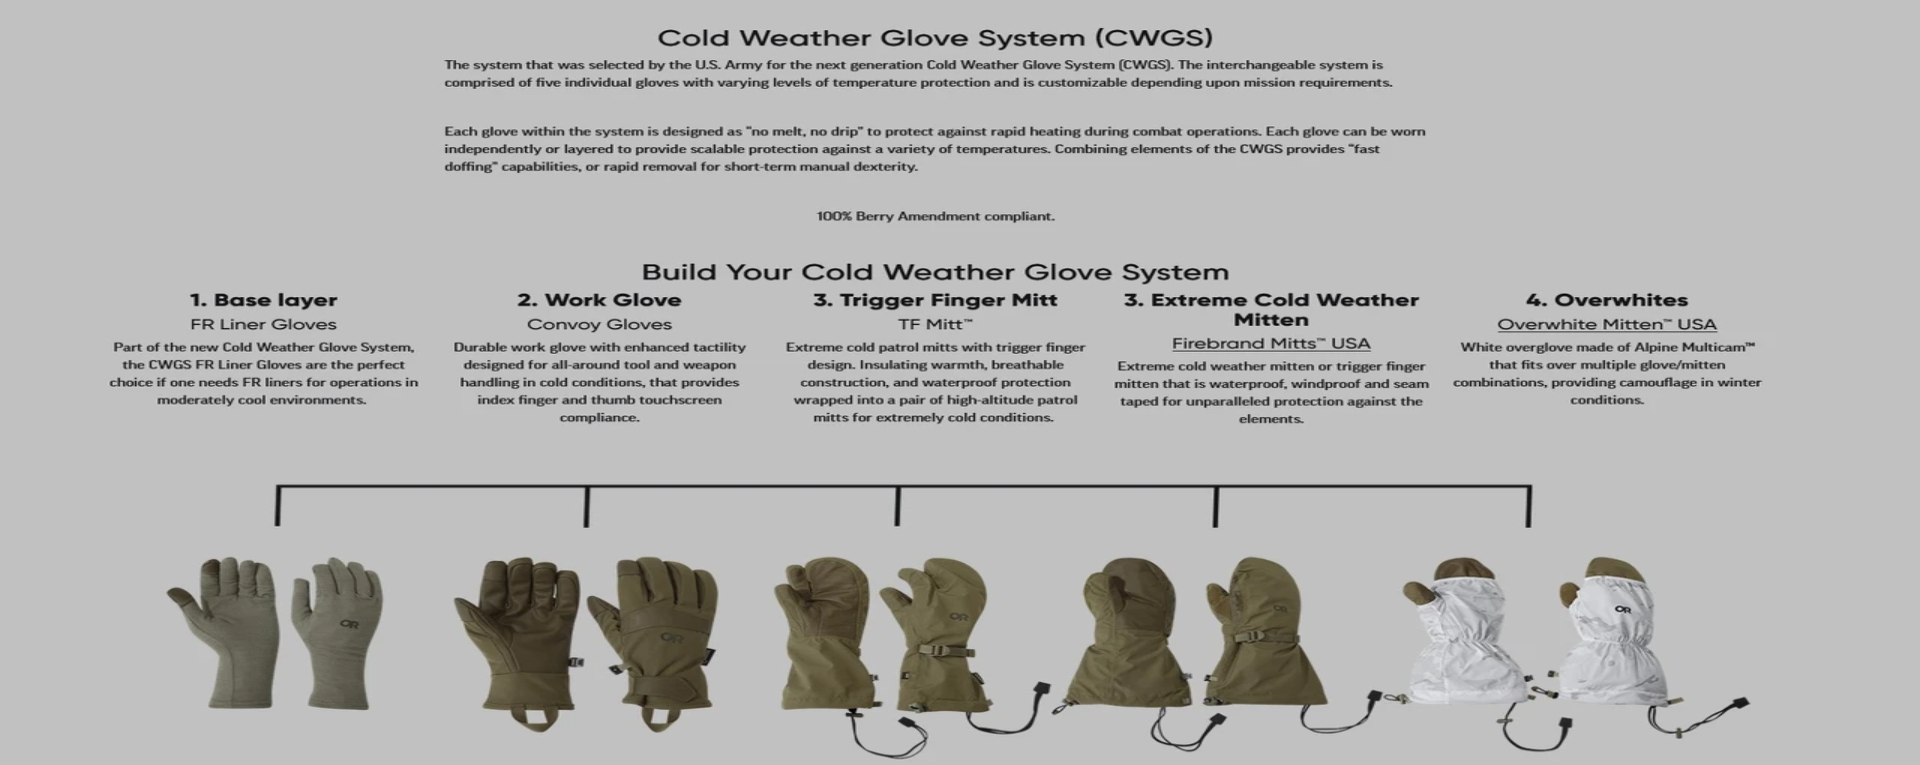
Gloves are where many Island Peak climbers underinvest, and inadequate hand protection is the quickest route to a serious cold injury at altitude. Two layers are necessary. A thin liner glove handles tasks requiring dexterity: clipping carabiners, operating an ascender, adjusting camera settings, pulling a water bottle from the pack. A heavy outer insulated glove or mitten goes on over the liner for everything else. Above the crampon point, the outer gloves stay on unless specific fine-motor work makes them temporarily impractical.
A third backup pair of gloves stored inside the daypack is good practice, particularly for early morning conditions below minus 15 degrees Celsius. Gloves that become wet from a glacier crossing and cannot be exchanged for a dry pair put the hands at risk for the rest of the summit day. This is not a theoretical scenario; it is a consistently documented pattern on Island Peak.
Headwear: Under and Over the Helmet
A warm fleece or merino wool hat worn under the climbing helmet covers the ears and temples, which lose heat rapidly at altitude. A balaclava or neck gaiter pulled up to cover the lower face and nose is important for the pre-dawn sections when wind chill on the ridge makes bare skin exposure genuinely uncomfortable and, in sustained cold, dangerous. The helmet goes on over the hat from the crampon point. The two items together provide coverage from chin to crown while accommodating the helmet's suspension system.
Socks and Gaiters
Insulated mountaineering socks worn with a thin liner sock inside the boot form the foot warmth system. The liner sock reduces friction and blister risk on the long approach and descent sections. Gaiters worn over the boot-trouser interface keep snow and ice from entering the boot during the glacier traverse, which is particularly important when crossing crevasse bridges or postholing through softer snow sections. Check the complete sock-boot-crampon combination before departure: a boot that fits well with a thin liner sock but becomes tight to the point of cutting circulation with a thick mountaineering sock is a problem that reveals itself as frostbite risk above 5,000 meters.
Packs: The Summit Daypack and the Main Duffel
Two separate bags serve different functions on this expedition, and understanding which items go in which is important for keeping the summit day pack at a manageable weight.
Main Duffel Bag (Porter-Carried, 70 to 80 Liters)
The main duffel carries everything not needed on the summit push and travels with the porter team on the approach and is left at base camp during the climb. This holds spare clothing layers, any non-summit-day personal items, books, additional food beyond summit day supply, and anything that would add unnecessary weight to the pack above 5,800 meters. The duffel should weigh no more than 12 to 15 kilograms when packed for the porter's comfort and within standard fair porter practice weight limits.
Summit Daypack (Carried to the Top, 25 to 35 Liters)
The summit daypack carries only what is needed for the 10 to 14 hours of summit day. Target weight is under 8 kilograms; every kilogram above that is disproportionately tiring above 5,800 meters where oxygen concentration is approaching half of sea-level values. The pack should have a sternum strap and hip belt for stability on the headwall, and compression straps to reduce bulk when partially loaded.
Contents of the summit daypack: two insulated water bottles (1.5 liters each), high-energy snacks (gels, chocolate, nuts, protein bars for a 10 to 14 hour effort), the down jacket stored when overheating and worn when stopped, a spare pair of gloves, the headlamp with spare batteries, sunscreen and SPF lip balm, glacier goggles on the face with backup sunglasses in the pack, a camera with a spare battery, a small personal first aid kit covering blisters and pain relief, a pulse oximeter, any personal medication, and carabiners and the ascender if not already attached to the harness.
Sleeping and Camp Gear for Base Camp and High Camp
Summit day performance depends heavily on sleep quality at altitude, and camp gear choices affect recovery and rest more than most climbers anticipate in advance.
Sleeping Bag
A sleeping bag with a comfort rating of minus 20 degrees Celsius is the correct specification for Island Peak's high camps. Base camp at 5,100 meters and high camp at 5,500 meters both experience night temperatures that drop to minus 15 degrees or lower. A bag rated to 0 degrees or even minus 5 degrees leaves climbers cold, poorly rested, and physiologically less capable of performing on summit day. A sleeping bag rated to 0 degrees is appropriate for teahouses on the approach from Lukla to Dingboche, and the warmer, heavier bag takes over from high camp onward. Many operators include a sleeping bag in the group equipment for the high camps; confirm this before packing.
Sleeping Pad
An insulated sleeping pad provides essential ground insulation at the high camps where the frozen substrate conducts cold upward through even a good sleeping bag. A closed-cell foam pad works reliably in conditions where inflatable pads occasionally deflate overnight in extreme cold, leaving users lying on a flat bag. The operator typically provides sleeping pads at the camps; confirm and carry a backup foam pad if uncertain.
Camp Shoes or Down Booties
Light camp shoes or down booties for moving around base camp in the evenings and mornings allow the mountaineering boots to rest and air out rather than being worn for the full 18 or more hours of a high camp day. Feet that spend every waking hour in stiff mountaineering boots arrive at summit day less comfortable than feet that got some recovery time. A pair of lightweight camp sandals or insulated down booties weighs very little and makes a noticeable quality-of-life difference at the high camps.
Health, Safety, and Practical Items
These items are not glamorous but their omission or underpacking creates real problems on summit day.
Headlamp
A headlamp is essential for Island Peak's pre-dawn summit start, and it needs to be reliable. Cold temperatures reduce battery life significantly; batteries that tested at three hours at room temperature may deliver one to two hours at minus 15 degrees. Bring two complete sets of spare batteries and keep the spare set inside a jacket pocket or sleeping bag at night to maintain warmth. A headlamp with a high-lumen main beam matters more than battery conservation mode for summit day, since the rocky pre-dawn scramble to the crampon point is the section where confident footing requires proper illumination. Test the headlamp the evening before the summit attempt.
Sunscreen and Lip Balm
UV exposure at 6,000 meters is extreme. UV intensity increases by approximately 4 percent per 300 meters of elevation, putting the UV load at the Island Peak summit at roughly 60 to 70 percent higher than at sea level. Snow reflection on the glacier amplifies this further. Sunburn at this altitude is rapid, affects skin through cloud cover on overcast days, and can be severe enough to cause painful blistering within 24 hours. Apply SPF 50 or higher sunscreen to all exposed skin before leaving base camp and reapply during any extended stationary period. SPF lip balm applied regularly prevents cracked, bleeding lips that are a minor but genuinely irritating consequence of dry cold air and high UV at altitude.
Glacier Goggles and Backup Sunglasses
UV-blocking glacier goggles with full side coverage are required for the summit day glacier and headwall sections. Standard sunglasses with open frames allow UV to enter from the sides, which is sufficient to cause snow blindness in a few hours on reflective glacier terrain at altitude. Category 4 filter goggles with 99 percent or higher UV protection are the appropriate specification. A backup pair of UV-rated wraparound sunglasses carried in the daypack covers the scenario of fogged or damaged primary goggles.
Water Bottles and Hydration
Insulated water bottles (1.5 liters each, two bottles) prevent water from freezing on summit day. Hydration bladder systems with drinking tubes are not recommended for the technical sections because the tube freezes within 30 to 45 minutes in below-zero conditions, rendering the system useless. Wide-mouth insulated bottles that can be opened with gloved hands and filled quickly at the crampon point water stop are the practical choice. Drink consistently throughout the day even without feeling thirsty: altitude suppresses the thirst sensation significantly while simultaneously increasing fluid requirements through increased respiration at thin air.
High-Energy Snacks
Summit day from base camp to the top and back can cover 10 to 14 hours of sustained physical effort. Pack enough food for that duration: energy gels (fast-releasing carbohydrate for the headwall section), chocolate and nut bars, trail mix, protein bars, and any high-calorie personal preferences that travel well in cold. Food brought from home or purchased in Kathmandu and Namche is a better quality option than what is available at base camp beyond the operator's provided meals. A thermos of hot sweet tea carried from base camp in a pack pocket stays warm until the crampon point and provides significant morale value at 5,800 meters in the pre-dawn dark.
Personal Medication and First Aid
Altitude sickness medication, specifically Acetazolamide (Diamox), should be discussed with a doctor before departure and brought if prescribed. The standard preventive dose is 125 to 250 milligrams twice daily, begun 24 hours before a significant altitude gain. Personal analgesics for headache, anti-diarrhea medication, anti-nausea tablets, and blister treatment supplies complete the personal medical kit. A pulse oximeter for individual SpO2 monitoring is a useful addition for self-awareness of acclimatization status from Dingboche onward.
What Your Operator Provides Versus What You Bring
This is the most practically important section of the gear planning process. What the operator includes in the climbing package varies significantly between companies, and assuming incorrectly in either direction means either packing duplicates or arriving without something essential.
Typically included in group climbing equipment (confirm with your operator before departure):
• Fixed ropes on the headwall, set by climbing Sherpas before the team's attempt
• Group safety rope for glacier traverse and summit ridge movement
• Crampons (some operators; always confirm fit before relying on this)
• Ice axe (some operators)
• Climbing helmet (some operators)
• Ascender and descender devices (some operators)
• Sleeping bag for high camp use (some operators)
• Down jacket on a loan basis (some operators; not a substitute for a properly fitted personal jacket)
• Base camp and high camp tents, cooking equipment, and food at camps
• Climbing Sherpa guide for the technical sections
Typically not included and the climber's personal responsibility:
• Mountaineering boots: always personal, never shared, non-negotiable as a personal item
• All personal clothing layers from base layer through to shell
• Personal harness (usually personal, though available to rent in Kathmandu)
• Personal carabiners and backup locking hardware
• Headlamp, batteries, and electronics
• Sunscreen, lip balm, and personal health and hygiene items
• Camera, power bank, and personal electronics
• Personal summit day snacks beyond any provided camp food
• Summit daypack (25 to 35 liters)
Request the operator's specific equipment list in writing before finalising the booking. Cross-reference it against the full gear list above and arrange purchase or rental for every item not confirmed as included.
Buy Versus Rent: A Practical Guide for Each Category
Kathmandu's Thamel district has a well-established gear rental market, and climbers from countries where mountaineering equipment is expensive or difficult to source can find functional rental options for most technical items. The buy-versus-rent decision varies by item.
Always Buy, Never Rent
Mountaineering boots are the one item on this list where rental is genuinely inadvisable. Fit, break-in time, and the specific shape of a foot inside a boot at altitude are too individual and too consequential for summit success and injury prevention to leave to the lottery of rental stock. Budget boots that have been worn for 30 hours are safer than perfect boots worn for the first time on summit day.
Personal clothing, including base layers, the down jacket, gloves, and headwear, is also in this category. Hygiene over a 3-week expedition makes these items personal.
Rent Confidently in Kathmandu (from Reputable Thamel Shops)
• Crampons: rental stock is generally good quality; insist on fitting them to your boots in the shop
• Ice axe: standard mountaineering axes are widely available; inspect pick and spike condition
• Helmet: lightweight climbing helmets are readily available; check suspension and strap condition
• Harness: inspect webbing for fraying and buckle function before accepting
• Ascender and descender: confirm correct size for the rope diameter the operator uses
• Sleeping bag: good down rental bags exist; check fill condition and zipper function
• Trekking poles: widely available and cheap to rent for the approach days
Buying in Kathmandu as a Middle Option
For climbers on expeditions from countries where gear is expensive (Australia, UK, much of Southeast Asia), buying mid-tier clothing and gear in Kathmandu is a cost-effective option. The markets in Thamel carry both genuine and replica North Face, Arc'teryx, and Marmot equipment. Genuine stock is available from established shops; replica stock is often adequate for trekking but should not be relied on for critical technical items. If buying a down jacket in Kathmandu, check fill consistency (shake the jacket and feel for clumping) and seam quality before purchasing.
The Summit Day Pack: Exactly What Goes In and What Stays at Camp
On summit day, the pack should contain only what is needed for the next 10 to 14 hours. Everything else stays at base camp or high camp. Weight is a genuine performance factor above 5,800 meters, where each additional kilogram translates directly into increased fatigue.
Goes in the Summit Daypack:
• Two insulated water bottles, 1.5 liters each
• Energy gels, chocolate bars, nuts, and high-calorie snacks for 10 to 14 hours of effort
• Down jacket (worn when stopped, stowed when overheating on the headwall)
• Spare pair of outer gloves
• Headlamp with spare batteries stored warm in a jacket pocket
• SPF 50+ sunscreen and SPF lip balm
• Glacier goggles (worn from the crampon point); backup sunglasses in the pack
• Camera or phone with a spare battery (cold kills batteries fast; keep the spare body-warm)
• Small personal first aid kit: blister treatment, paracetamol, personal medication
• Pulse oximeter
• Locking carabiners (2 to 3), ascender if not pre-attached to harness
Stays at Base Camp or High Camp:
• Main duffel bag with all spare clothing
• Trekking poles (not useful above the crampon point; take up pack space unnecessarily)
• Books, journals, entertainment items
• Laptop, tablet, or items not needed for the next 14 hours
• Extra food and personal items beyond summit day supply
• Hotel toiletry bag and non-essential personal items
Electronics: Camera, Phone, and Power Management
Documenting an Island Peak summit is understandable, but electronics add weight and create cold-related reliability issues above 5,000 meters that are worth planning for explicitly.
Cold temperatures cause lithium-ion batteries to discharge significantly faster than at room temperature. A phone that shows 80 percent charge inside the tent may read 20 percent within 30 minutes in the pre-dawn cold unless the device is kept warm against the body. Keeping the phone and any camera batteries inside a jacket pocket close to the torso on the approach maintains their charge and extends their usable life on the mountain.
A high-capacity power bank (20,000 mAh or above) charged fully at Dingboche before the final approach to base camp provides enough reserve power to charge a phone and camera battery multiple times during the high camp days. Solar charging panels are an additional option at base camp where the sun is strong during clear days at altitude.
GoPro cameras work well for hands-free summit documentation and handle cold better than smartphones. If bringing a mirrorless or DSLR camera, keep it under the down jacket between shots rather than hanging outside the pack where it will cool rapidly. Spare batteries kept inside the jacket, not in the pack's exterior pockets, remain functional when the primary battery depletes.
A Note on Gear Quality and the Real Cost of Cutting Corners
Island Peak is frequently described as an accessible first summit, and in one dimension that is accurate: it does not require years of technical training to reach the top. What it does require is gear that functions correctly at the conditions encountered above 5,800 meters. The mountain is unforgiving of equipment that works at low altitude but fails in genuine cold.
The most common gear-related incidents on Island Peak are documented and consistent: boots that are not warm enough for the temperatures above the crampon point, gloves that become ineffective after the glacier crossing, and crampons that were never properly fitted to the boots and shift at the worst possible moment. None of these failures involves exotic technical error. All of them involve gear choices that were made at a price point or convenience level that was appropriate for a less demanding environment.
The investment in correct gear for this climb is meaningful. Mountaineering boots at this level cost between USD 300 and 700; the right down jacket runs from USD 200 to 500; glacier goggles and gloves add another USD 100 to 200. Renting in Kathmandu reduces the personal outlay for this specific trip. But whatever the sourcing method, the standard to aim for is gear that is rated for the conditions, fitted properly, and tested before departure day. On Island Peak, that preparation is the margin between a summit and a turned-around expedition.
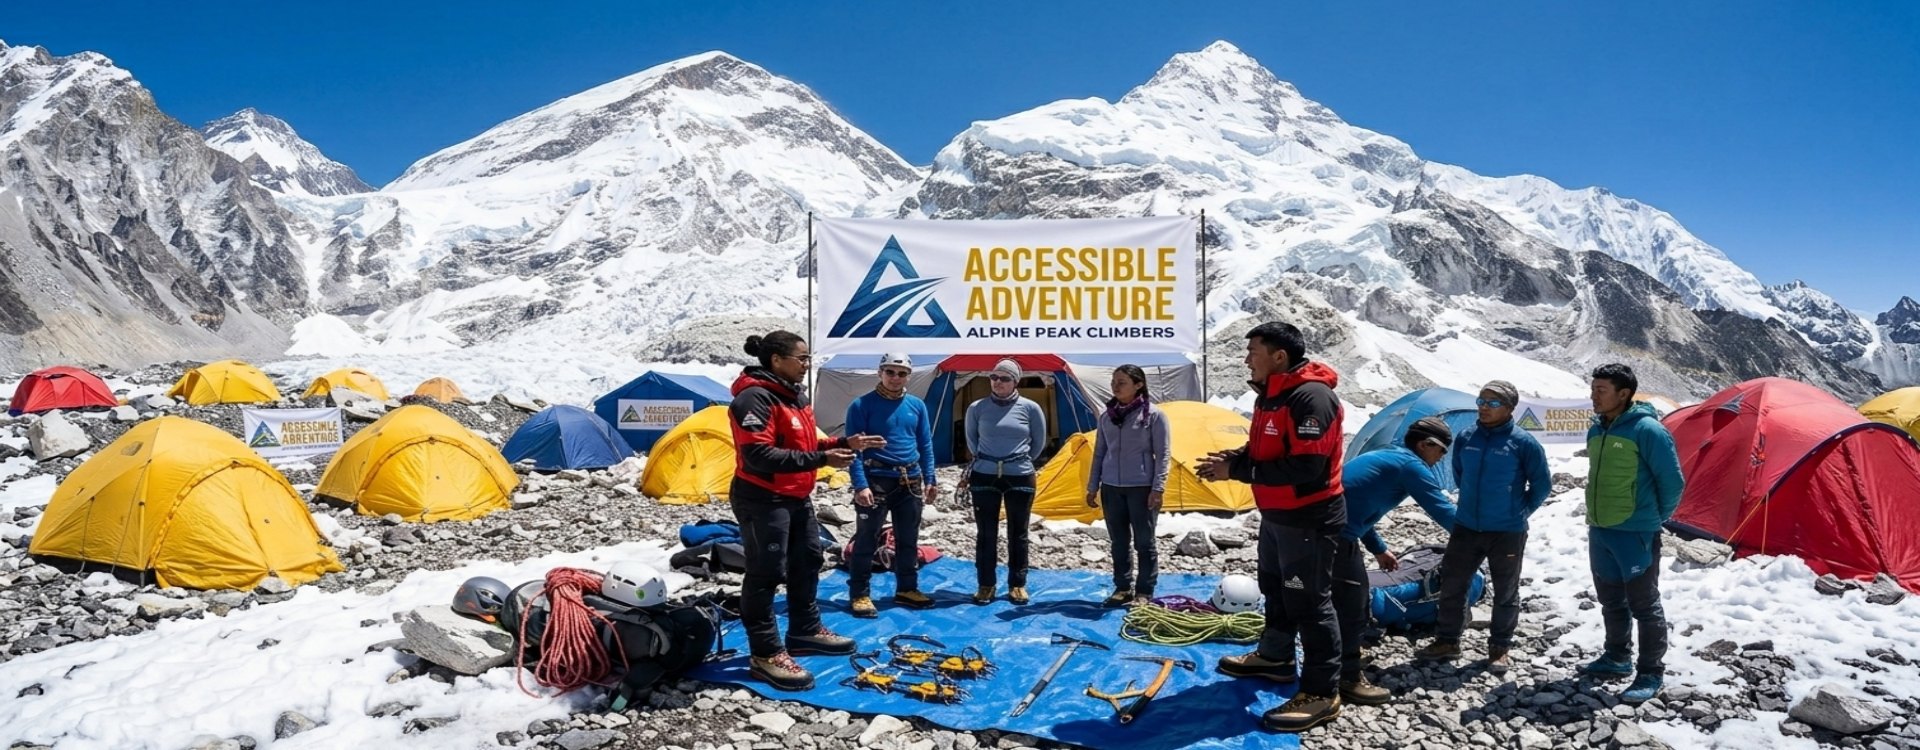
At base camp, Team Accessible Adventure Private Limited runs a gear check with every climbing team before the summit push, specifically inspecting crampon-to-boot fit, harness adjustment, glove layering, and boot warmth. This isn't bureaucracy; it is the last practical chance to catch a problem that can still be fixed before the team moves onto the glacier.
Planning Your Island Peak Gear with the Right Support
Getting the Island Peak gear list right is a concrete preparation task with a clear outcome: arriving at the crampon point with equipment that functions correctly for the conditions above. Every item on the list serves a specific purpose that becomes obvious on summit day.
We work with every climbing client through a pre-departure gear consultation and a base camp gear check before the summit push. If there are gaps in the gear list, we identify them in Kathmandu while shops are available, not at base camp when the mountain is already above you. If you have questions about what to bring, what the operator provides, or where to source specific items in Kathmandu, reach out to us directly. This conversation is easier to have before departure than at 5,100 meters the night before a summit attempt.
Frequently Asked Questions
Not necessarily. Many operators include crampons in the group technical equipment provided for the climb, so the first step is to confirm whether your operator's package covers this. If the package does not include crampons, they can be rented in Kathmandu from shops in the Thamel area. The key requirement is that the crampons fit your mountaineering boots correctly. Bring the boots to the shop, have the crampons fitted properly, and walk around in the combination before leaving. A crampon that fits one boot style may not work with another, so size alone is not a sufficient basis for selection.
You can, and many climbers do, but it comes with meaningful risk. Renting boots means the fit has not been tested over the dozens of hours of walking needed to break them in, and the specific shape of your foot inside a rental boot at 5,800 meters in the cold is unknown until summit day. Mountaineering boots that have not been worn before create a high probability of blisters at best and serious pressure points at worst on a 10 to 14-hour summit day. If renting is the only practical option, visit the shop on the first day in Kathmandu, wear the boots for as many hours as possible in the city over the following days, and carry sufficient blister treatment supplies. Buying and bringing personal boots from home is strongly preferable.
The practical differences are three. Sole rigidity: a mountaineering boot has a stiff sole that can front-point on steep ice when the crampon is attached; a trekking boot flexes too much for this to be effective and can cause crampon binding movement under load. Warmth: mountaineering boots are insulated for temperatures well below zero; most trekking boots are not rated below minus 5 to minus 10 degrees Celsius. Crampon compatibility: mountaineering boots have welt rims or compatible binding points for 12-point mountaineering crampons; most trekking boots only accept strap bindings or are not crampon-compatible at all. Island Peak's conditions above 5,800 meters require all three of these characteristics, which means trekking boots cannot safely substitute for mountaineering boots on the upper section.
Operator inclusions vary, which is why confirming the specific list before departure is essential. Most operators provide: fixed ropes on the headwall (set by climbing Sherpas), a group safety rope for the glacier traverse, tents and cooking facilities at base camp and high camp, and a climbing Sherpa guide. Many operators also include crampons, an ice axe, a helmet, an ascender, and a sleeping bag as part of the group equipment. What is virtually never included in a package is mountaineering boots, personal clothing layers, personal carabiners and hardware, a headlamp, sunscreen and personal health items, and the summit daypack. Request the operator's written equipment list before finalising the booking.
Temperatures on summit day in spring (March to May) or autumn (September to November) typically range from minus 10 to minus 20 degrees Celsius at the crampon point and above, factoring in wind chill. The pre-dawn hours from base camp to the glacier are the coldest period, often registering the lowest apparent temperature of the day because wind chill in the dark hours is more acute than later when solar radiation begins to warm exposed surfaces. The summit at 6,189 meters can experience temperatures of minus 15 to minus 25 degrees Celsius including wind chill even in the main climbing seasons. All gear choices for the upper mountain should be rated comfortably beyond these temperatures.
Yes. An ice axe is required for Island Peak's upper section. It is used for balance on the glacier traverse, as a self-arrest tool on the approach and descent, and as a general stability aid on steep snow. The headwall itself is climbed on fixed ropes using an ascender rather than axe technique, but the axe is carried throughout summit day and is an essential safety item. Many operators include an ice axe in the group equipment; confirm this before making independent arrangements. A standard 60 to 70 centimeter mountaineering axe, not a technical tool designed for ice climbing, is the appropriate type.
A sleeping bag with a comfort rating of minus 20 degrees Celsius is the correct specification for the Island Peak high camps. Base camp sits at 5,100 meters and high camp at 5,500 meters; night temperatures at both can drop to minus 15 degrees or lower. A bag rated to 0 degrees, commonly recommended for Khumbu teahouses, is dangerously inadequate for the high camp nights. A sleeping bag rated to minus 10 degrees is marginal; minus 15 is adequate; minus 20 provides a genuine comfort margin. Many operators include a sleeping bag in the high camp equipment provided; confirm whether this is the case and check the bag's actual rating when it is handed over.
A down jacket combined with insulated shell trousers is sufficient for Island Peak. A full one-piece down suit, of the type used on 8,000-meter expeditions, provides more warmth than the conditions require and tends to cause overheating during the high-exertion sections of the headwall. A good quality down jacket rated to minus 15 degrees or below, combined with waterproof and windproof shell trousers and a warm base layer plus fleece mid layer on the lower body, covers the temperature range encountered on Island Peak. Insulated summit trousers (down-filled trousers rather than shells) are worth bringing if you run cold; they add warmth on the stationary sections without requiring a full suit.
The pre-dawn rocky scramble from base camp at 5,100 meters to the crampon point at around 5,800 meters covers steep scree and loose rock terrain in darkness and cold. Most climbers wear their full summit day clothing system for this section: mountaineering boots (either from the start or changed into at base camp before departure), thermal base layers, fleece mid layer, down jacket, shell jacket and trousers, and full glove layers. Trekking boots are technically usable for this section only, but the boot change required at the crampon point in the dark and cold makes this a problematic convenience. Wearing mountaineering boots from the start eliminates the boot change and ensures feet are in the correct footwear throughout.
Glove selection is one of the most consequential gear decisions on this climb. Inadequate glove protection is responsible for a significant proportion of cold-related injuries and early turnarounds on Island Peak. The system that works is: a thin merino or synthetic liner glove for dexterity tasks (clipping carabiners, operating the ascender, handling camera), combined with a heavy insulated outer glove or mitten for all other phases of the climb. The outer gloves should be rated to at least minus 20 degrees Celsius and should fit loosely enough over the liner to not restrict circulation. A backup pair of outer gloves stored in the daypack provides essential redundancy; gloves that become wet from a glacier crossing with no dry alternative available are a genuine emergency.
A daypack of 25 to 35 liters is the practical range for Island Peak's summit day. Smaller packs do not have adequate space for the required gear including two water bottles, a down jacket, spare gloves, food, and climbing hardware. Larger packs add unnecessary dead weight and become unwieldy on the headwall. The pack should have a sternum strap and hip belt for stability during the technical sections, compression straps to reduce bulk, and an easily accessible top lid or hip pocket for items needed frequently (sunscreen, water, snacks) without removing the pack on the headwall.
Hydration bladder systems with drinking tubes are not recommended for Island Peak's summit day. The drinking tube freezes within 30 to 45 minutes in below-zero temperatures, rendering the system useless at exactly the point when consistent hydration is most important. Wide-mouth insulated water bottles that can be opened and drunk from with gloved hands are the practical solution. Keep the bottles inside the pack rather than in external mesh pockets to maintain the water temperature above freezing as long as possible.
A smartphone is the minimum most climbers bring and is adequate for photos in good conditions if kept warm inside a jacket between shots. A GoPro action camera attached to the helmet or chest mount provides hands-free footage and handles cold temperatures better than most smartphones. A mirrorless camera with a spare battery (kept body-warm) produces higher quality images for those to whom this matters. A high-capacity power bank (20,000 mAh or above), charged at Dingboche before the final approach to base camp, provides enough reserve power for the high camp days where teahouse charging is unavailable. All batteries should be kept as warm as possible throughout summit day since cold kills charge capacity faster than use does.
For many climbers, yes. A GoPro (or equivalent action camera) attached to the helmet or shoulder provides hands-free video documentation of the technical sections without requiring the removal of gloves to operate a camera. Action cameras handle cold temperatures better than smartphones, respond to cold-weather gloved inputs more reliably, and can be stowed easily in a jacket pocket between use. The main limitation is that fixed-wide-angle footage does not convey the summit panorama as impressively as a longer focal length, so combining a GoPro for the climbing sections with a phone or camera for static summit shots covers both purposes.
The most important medication decision for Island Peak is whether to use Acetazolamide (Diamox) as a preventive altitude sickness measure. This is a conversation to have with a doctor familiar with altitude medicine before departure. If prescribed, the standard preventive dose is 125 to 250 milligrams twice daily, begun 24 hours before a significant altitude gain and continued through the acclimatization period. Beyond Diamox, the personal medical kit for this expedition should include an analgesic for headache (ibuprofen or paracetamol), anti-nausea tablets, anti-diarrhea medication, a blister kit, throat lozenges for the dry air at altitude, and any personal prescription medication. A pulse oximeter for SpO2 monitoring is a useful addition from Dingboche onward.
Yes. Gaiters worn over the boot-trouser join keep snow and ice from entering the boot during the glacier traverse and the headwall sections. On the approach trail from Lukla to base camp, gaiters are less critical outside of fresh snowfall conditions but are worth wearing from the crampon point onward throughout the technical climbing section. High gaiters that reach the lower calf provide better coverage than ankle gaiters on the glacier sections. Most gaiters attach to the boot sole with a welt hook and a velcro or buckle top strap and are quick to put on and remove.
A headlamp with a minimum main beam brightness of 200 lumens is appropriate for Island Peak's pre-dawn rocky scramble. The rocky section to the crampon point requires confident footing in complete darkness, and a dim headlamp that illuminates only the immediate ground in front of each foot step is both slower and riskier than a brighter beam that allows planning several steps ahead. Rechargeable headlamps are fine if charged at Dingboche before the final approach; for the summit push itself, battery-powered models with standard lithium cells are more reliable since batteries can be kept warm overnight. Test the headlamp the evening before the summit attempt and confirm it is functioning on the correct brightness setting.
Carry a minimum of 3 liters for summit day, divided across two insulated bottles. More is better if the pack weight allows. Altitude significantly reduces the sensation of thirst while increasing fluid loss through respiration, which means systematic drinking every 30 to 40 minutes regardless of thirst is the correct approach rather than drinking when thirsty. Dehydration at altitude worsens headache, reduces cognitive clarity, and increases fatigue in ways that are well-documented and directly relevant to summit day performance. A thermos of hot tea or sweet liquid brought from base camp adds a psychological and caloric boost on the pre-dawn approach.
Trekking poles are useful on the approach from Lukla to base camp and are worth bringing for the multi-day trek. On summit day specifically, poles are not practical above the crampon point because both hands are needed for the ascender, the fixed rope, and ice axe use on the technical sections. Most climbers leave poles at base camp or high camp before the summit push. Bring adjustable poles that can be stowed in or attached to the main duffel bag during the climbing section.
Based on consistent guide experience over multiple seasons, the most commonly forgotten or under-packed item is backup gloves. Climbers pack a primary glove system but arrive at base camp without a spare set. A glove that becomes wet, damaged, or lost at the crampon point or on the glacier leaves the hands at real risk for the remainder of the summit day, and there is no opportunity to retrieve a replacement from the duffel at camp. Pack at minimum two complete outer glove pairs and two liner pairs. The second liner pair doubles as a dry spare and as camp gloves. The second outer pair stays in the daypack throughout and is used only if the primary pair fails.
A full balaclava is worth including for Island Peak's pre-dawn sections, particularly for the rocky approach below the crampon point where wind chill at the ridge sections can be severe. A hat that covers the ears and a buff or neck gaiter pulled up to the nose provides equivalent coverage and works well for many climbers. The important thing is that the lower face, nose, and chin are covered in the coldest pre-dawn hours. Frostbite on the nose and cheeks at altitude develops faster than most people expect, particularly when strong cold wind combines with the chill of altitude. Either a balaclava or the hat-plus-gaiter combination is adequate; the balaclava is simpler because it is a single adjustment.
Wearing mountaineering boots for the entire summit day is the recommendation of most experienced Island Peak guides. The alternative, wearing trekking boots for the rocky approach and changing into mountaineering boots at the crampon point, requires a boot change in the dark, cold, and often wind at around 5,800 meters, which is slow, uncomfortable, and creates a moment of being bootless on exposed terrain. Mountaineering boots worn from base camp are heavier and less comfortable on the rocky sections, but this is a manageable trade-off compared to the alternative. If the operator specifically recommends the boot change approach, follow their guidance, but confirm the procedure before the summit attempt and practice it at camp in full clothing.
Tell your guide immediately. The most dangerous thing a climber can do on Island Peak is continue ascending while managing a gear failure quietly, hoping it resolves itself or that the summit justifies the discomfort. Cold feet that are progressively numbing, gloves that are no longer effective, or a headlamp that is failing are all situations that communicate to the guide team before the problem becomes irreversible. Guides with Island Peak experience have managed every one of these scenarios and know whether the situation is recoverable with the available resources or whether descent is the correct call. No summit is worth the consequences of inadequate gear pushed past its limits at 6,000 meters.
About Accessible Adventure
Bringing unforgettable Himalayan adventures to everyone. Our expert guides and carefully curated experiences ensure that everyone can explore the beauty of Nepal, Tibet, and Bhutan.
Learn More