No cancellation fees. No hassle. Book Now, Cancellation Terms
Peak ClimbingTrekking Regions+36
26 min readIsland Peak Climbing Difficulty: How Hard Is Imja Tse?
August 6, 2026
26 min
198 views
A grounded, no-nonsense look at what the climb actually demands
If you've spent any time researching trekking peaks in Nepal, you've probably run into the same question over and over: is Island Peak actually hard? It's a fair thing to wonder about, because the marketing around this mountain swings wildly between two extremes. Some listings call it a beginner-friendly summit that almost anyone can reach with a guide. Others describe it as a serious mountaineering objective that has turned back fit, determined trekkers. Both of these things are true, depending on which part of the climb you're talking about.
Island Peak, known locally as Imja Tse, sits at 6,189 metres in the Khumbu region of eastern Nepal, wedged between the towering walls of Lhotse and the more modest slopes of Ama Dablam. It was first climbed in 1953 as a training exercise for the Everest team led by Edmund Hillary, which tells you something important right away. This mountain has always been treated as a proving ground, not a stroll. That reputation has stuck for over seventy years, and for good reason.
We've guided enough climbers up this route to know that the honest answer to 'how hard is it' isn't a single word like moderate or difficult. It's a climb with two very different personalities. The approach is a demanding but non-technical trek. The summit push is a genuine alpine climb with rope work, crevasses, and a headwall that has ended more than a few summit attempts. This guide breaks down exactly where the difficulty comes from, who tends to struggle, and what you can do in the months before your trip to make sure you're one of the people standing on top rather than turning around at the fixed lines.
The Short Answer: Moderately Difficult, With One Genuinely Hard Section
Island Peak is usually graded PD+ (Peu Difficile Plus, meaning 'fairly difficult') on the French Alpine system, which some operators round up to Alpine Grade 2B. Under the Russian grading system it also lands around category 2B, and it sits in Class III to IV under the UIAA scale. None of those numbers mean much on their own, so here's the plain version: this is not a walk-up peak, and it is not an expedition-grade climb either. It occupies the middle ground, and it earns that classification almost entirely because of a single feature near the top.
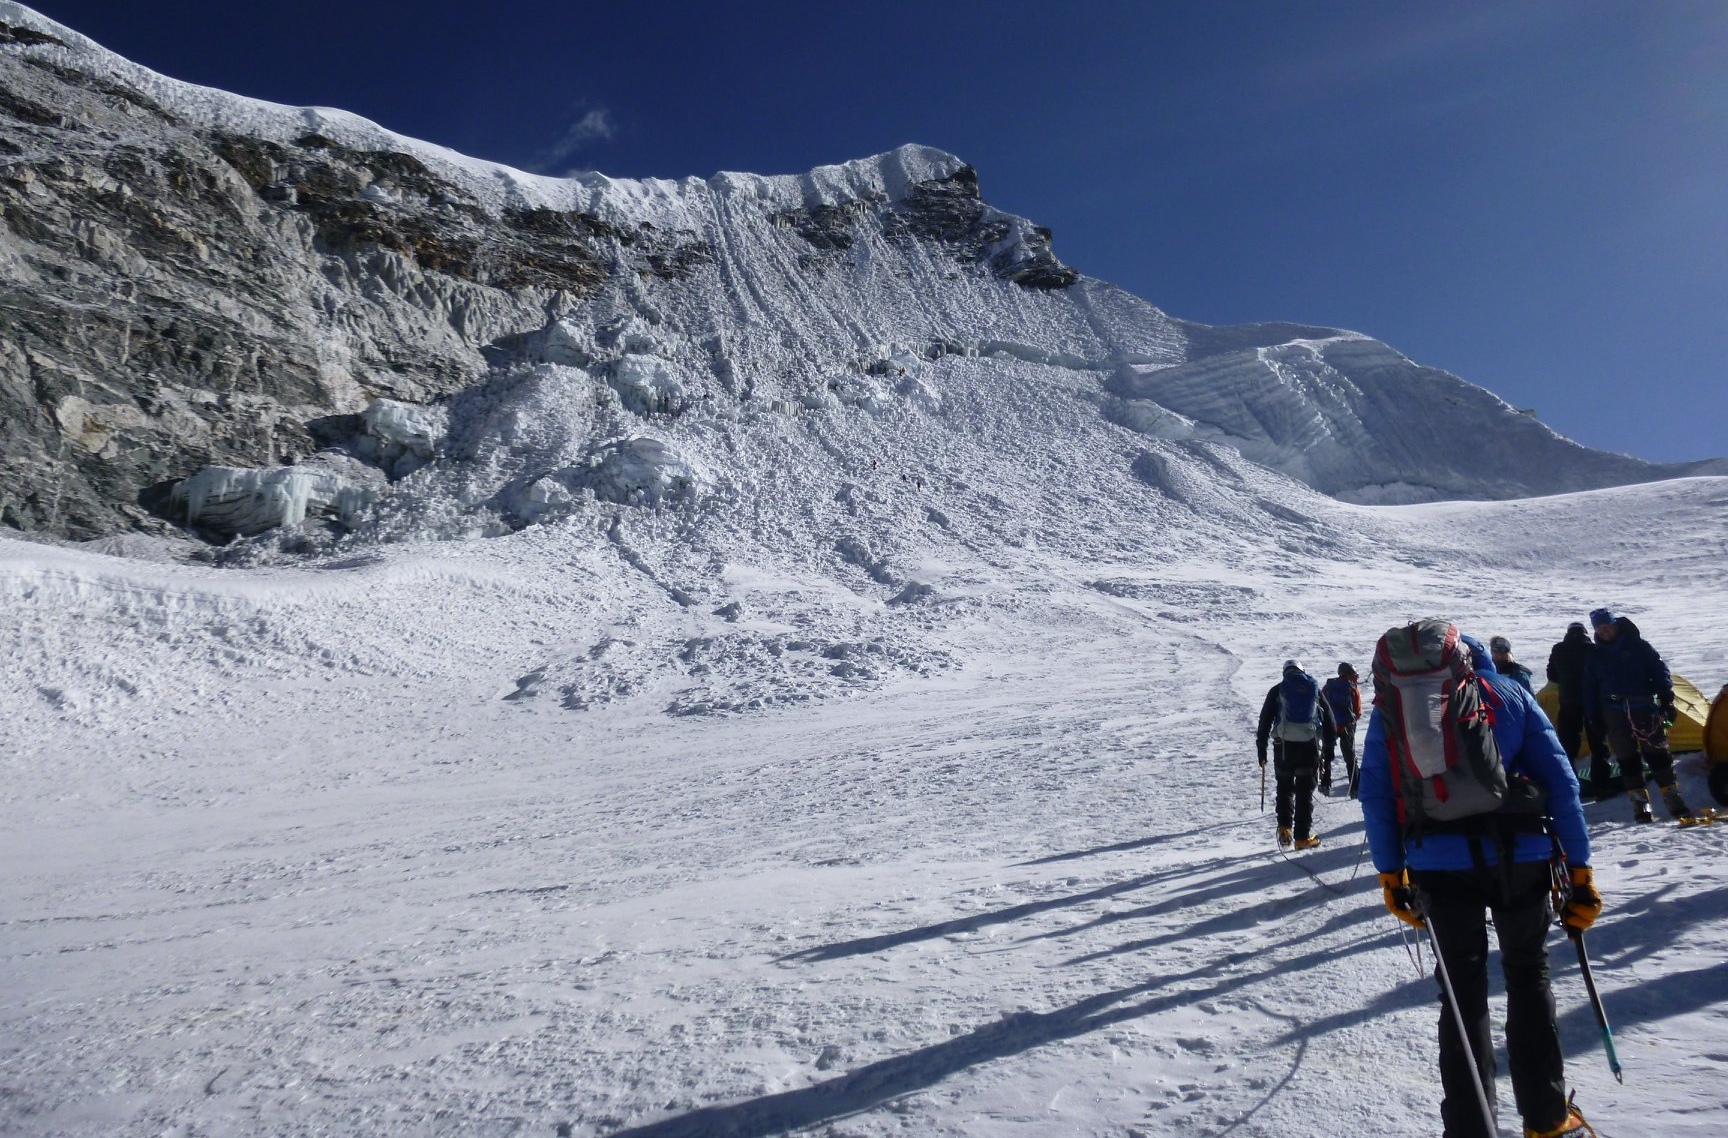
That feature is the headwall. From base camp, the first several hours of summit day are a strenuous but straightforward hike over rock and moraine, followed by a section of scrambling up a broad gully. Once you reach the glacier, the character of the climb changes completely. You'll rope up, cross a stretch of crevassed ice, and then face a steep snow and ice wall that typically runs somewhere between 100 and 200 metres, depending on the season and how much snow has bonded to the ice beneath it. This is where fixed ropes go in, and where climbers use a jumar to ascend rather than relying purely on crampon technique. It's steep, it's exposed in places, and it's the part of the climb that actually requires you to have practiced with the gear beforehand, even if that practice happens at base camp the night before.
Above the headwall, the route narrows onto a summit ridge that's exposed on both sides and often crowded with other climbing teams sharing a single fixed line. There usually isn't room for more than four or five people on the actual summit at once, so patience matters as much as fitness up there. Once you're through the headwall, though, the technical difficulty mostly resolves itself. Getting down safely, tired legs and all, is its own challenge, but it's the ascent of that wall that defines whether Island Peak feels hard or merely long.
Where the Difficulty Actually Comes From
1. Altitude, Not Technical Skill, Is the First Filter
Before you ever touch a fixed rope, you have to get yourself to a base camp sitting at roughly 5,087 metres, and that in itself weeds out more climbers than the headwall does. The approach trek typically runs through Namche Bazaar, Tengboche, Dingboche or Chhukung, gaining altitude gradually enough to acclimatise properly, but the effects of thin air are cumulative. Headaches, disturbed sleep, and a noticeable drop in appetite are common even for people who consider themselves fit. This isn't a symptom of poor preparation. It's simply what altitude does to the human body, and it affects seasoned trekkers just as often as first-timers.
The climbers who struggle most on summit day are frequently not the ones with weak legs. They're the ones who didn't acclimatise properly on the way up, either because they rushed the itinerary or ignored early warning signs. A well-built schedule with rest days at Namche and Dingboche does more for your summit chances than any amount of gym training back home.
2. Summit Day Is Long Before It's Technical
Most itineraries have you leaving base camp between midnight and 3am, aiming for the summit in darkness so you can be back down before the afternoon winds pick up. Round trip, you're looking at 10 to 14 hours on the move, with over 1,000 metres of elevation gain packed into a single push. That's a genuinely long day even before you factor in the technical section, and fatigue tends to compound every other risk. Climbers who are gassed by the time they reach the glacier make more mistakes on the headwall, move slower, and take longer to recover on the way down. Pacing yourself on the lower slopes, even when it feels frustratingly slow, pays off later.
3. The Headwall Demands Comfort With Gear, Not Advanced Skill
This is the part everyone asks about, so it's worth being precise. You do not need prior ice climbing experience to get up the Island Peak headwall. What you do need is basic comfort using a jumar, an ice axe, and crampons on steep ground, and the ability to trust a fixed line rather than fighting against it. Guiding companies including ours run a short training session at base camp specifically to cover this, usually the day before the summit attempt, and it's enough for most reasonably fit climbers to get through the real thing safely.
Where people run into trouble is usually a mix of unfamiliarity and fatigue rather than the technique itself being too advanced. Hauling yourself up a jumar for the first time, at altitude, in the dark, after several hours of hiking, is tiring in a way that a gym session never quite replicates. It's manageable. It's just not effortless, and nobody should walk into it expecting it to be.
4. Weather and Conditions Change the Difficulty Year to Year
The headwall itself is not a fixed, static obstacle. Depending on the season, it can be hard blue ice that demands sharp crampon points and precise footwork, or softer, snow-covered ice that's more forgiving underfoot but slower to move through. Pre-monsoon climbs in spring tend to meet harder ice, while post-monsoon autumn climbs often find more consolidated snow. Neither is objectively easier across the board, and conditions can shift within a single season depending on recent weather. This is one of the reasons a guide's real-time judgment matters more than any fixed difficulty rating printed on a website.
A Section-by-Section Breakdown of the Climb
It helps to walk through the route in order, because the difficulty isn't spread evenly across the day. Some stretches are genuinely easy. Others demand your full attention. Knowing which is which ahead of time takes a lot of the mental pressure off, since you're not left guessing whether the next twenty minutes will be a stroll or a struggle.
Base Camp to the Crampon Point
Summit night begins in the cold and dark, usually somewhere between midnight and 3am depending on your team's pace and the length of the route ahead. The first stretch out of base camp, sitting at around 5,087 metres, is a steady uphill hike over loose rock and scree. It isn't technical in any real sense, but it's tiring simply because you're doing it in the dark, at altitude, with a headlamp as your only source of light. This is where pacing discipline matters most. Climbers who charge out of camp too quickly often pay for it two or three hours later, right around the point where the terrain actually starts to demand something from them.
Some itineraries include an optional overnight at a high camp near 5,600 metres instead of starting from base camp itself. This shortens summit night considerably, though it comes with its own tradeoffs around water availability and sleeping at a higher altitude. Either approach works, and which one suits you better usually comes down to how you're acclimatising and how your guide reads the group's condition.
The Scramble and the Approach to the Glacier
After an hour or two of steady hiking, the trail steepens into a broad, rocky gully that requires basic scrambling, using your hands as well as your feet on occasion. It's not exposed climbing in any technical sense, more a matter of picking careful footing on uneven rock in low light. This section catches some climbers off guard simply because they weren't expecting to use their hands at all before reaching the glacier, but it rarely poses a serious problem for anyone with reasonable trekking fitness.
At the top of the gully, the terrain changes abruptly. This is where you'll stop to put on crampons, rope up with your team, and switch mentally from trekking mode into climbing mode. It's worth treating this transition seriously rather than rushing it. Checking your harness, your crampon fit, and your rope connection carefully here saves problems later, when you're tired and the light is still poor.
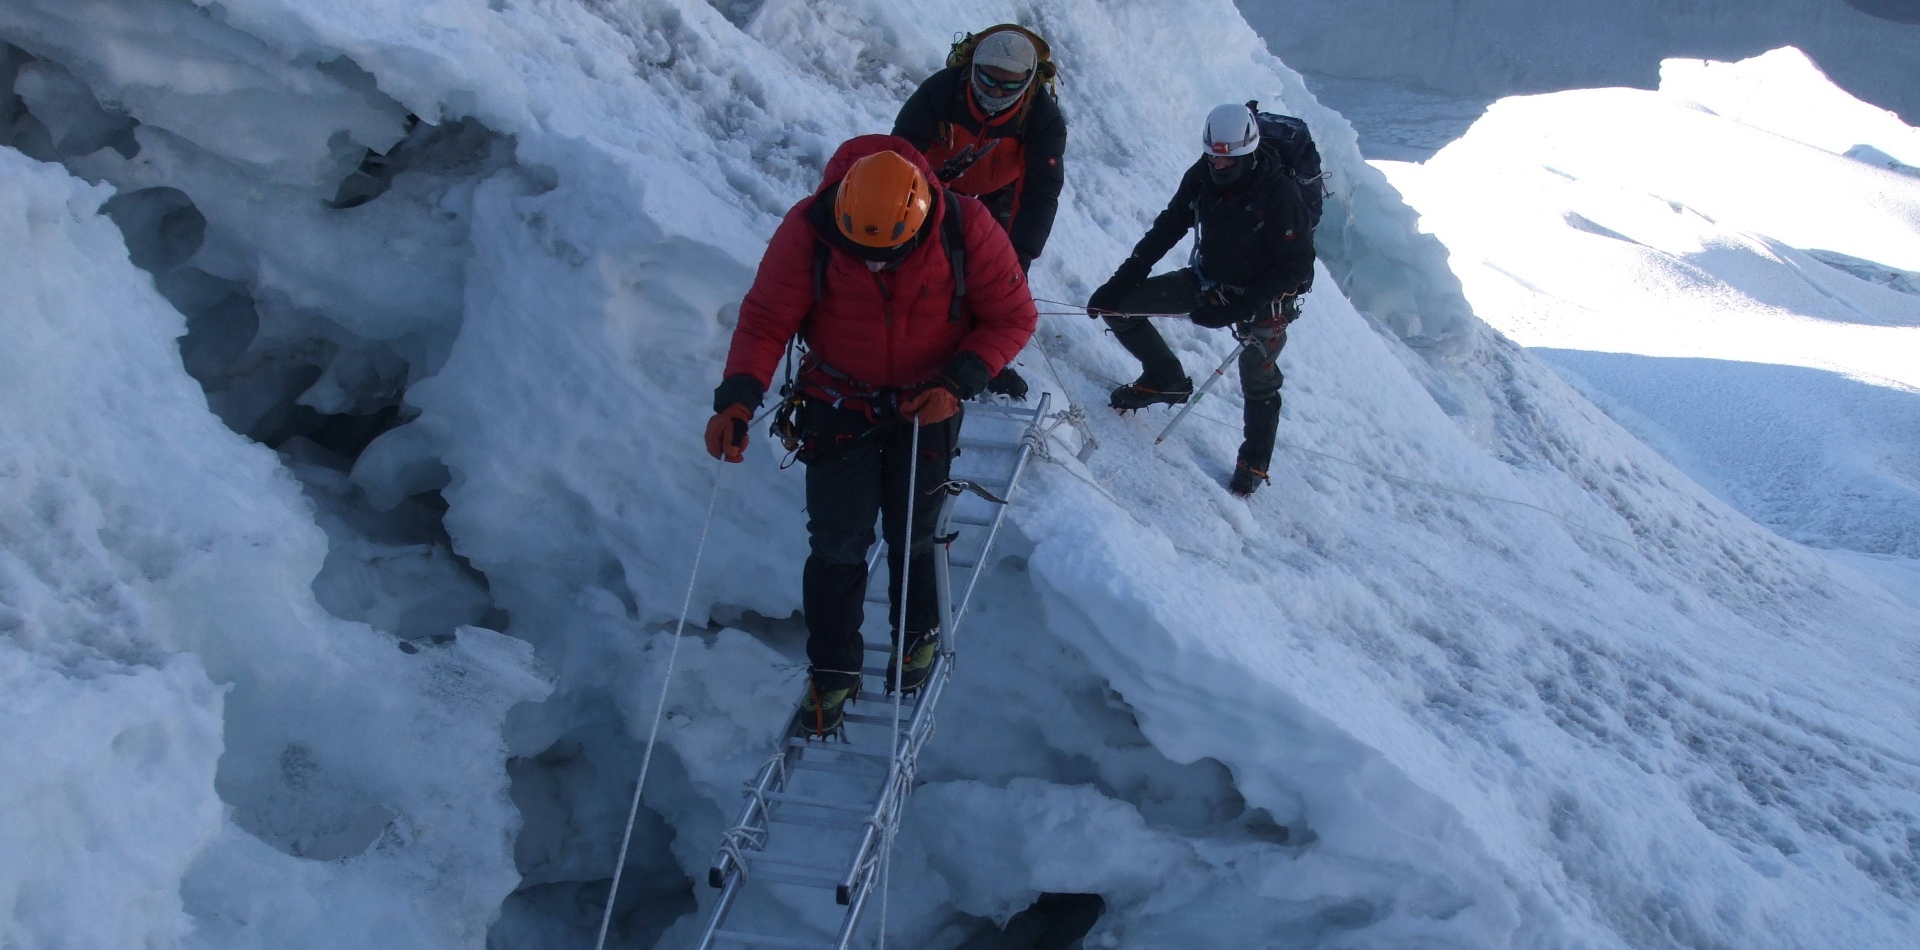
Crossing the Glacier
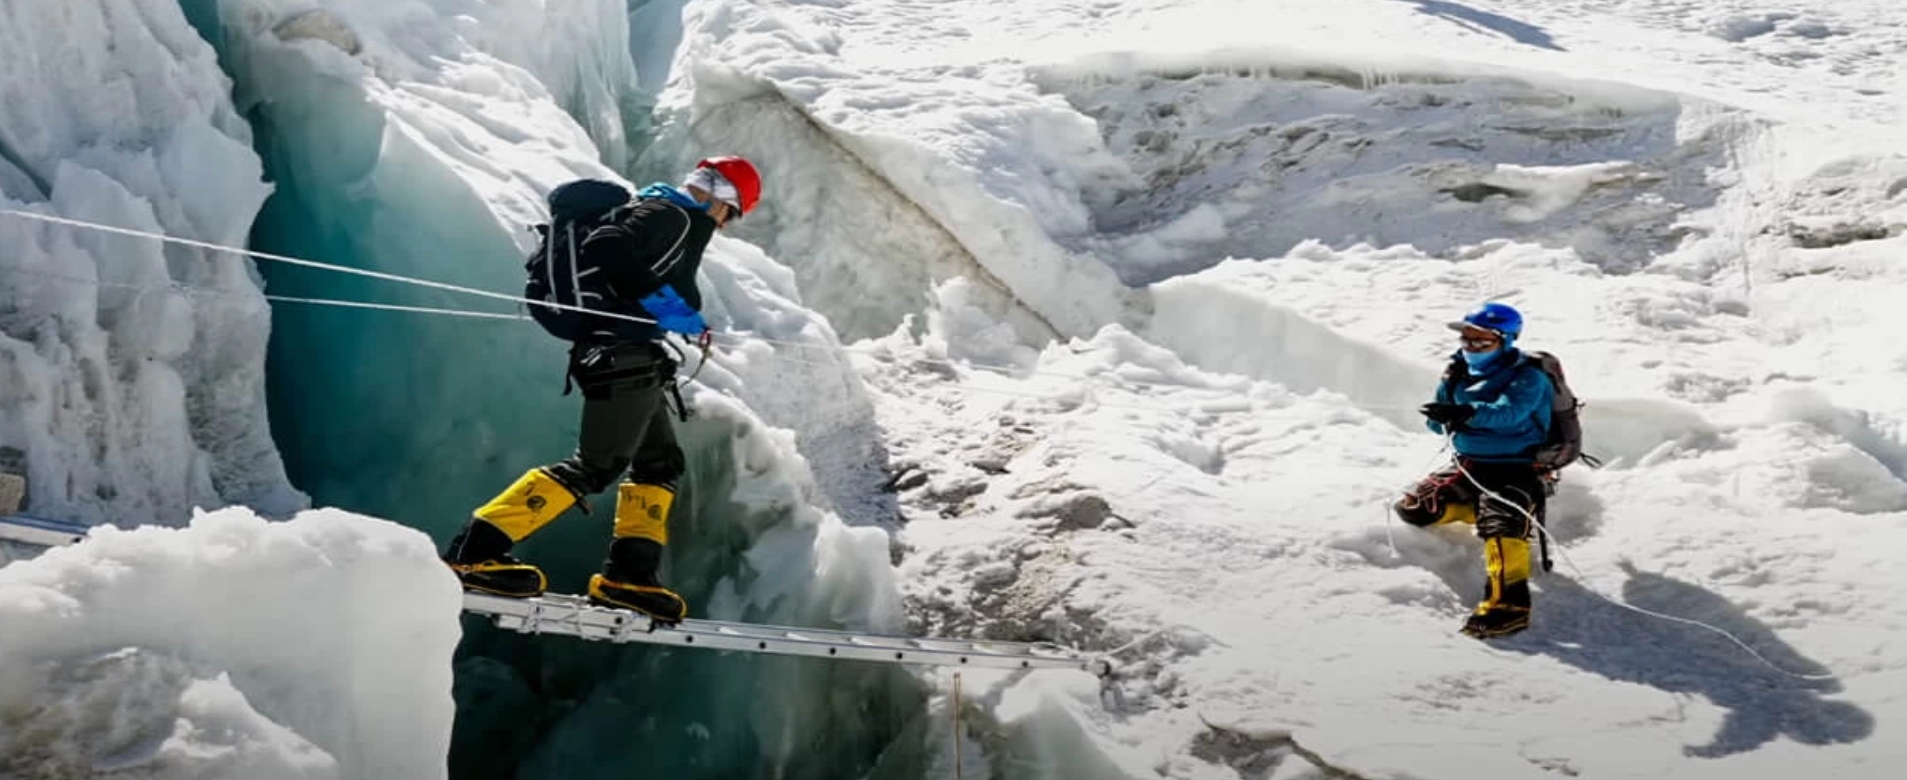
The glacier crossing itself is where the objective hazards of the climb become real rather than theoretical. Crevasses, some visible and some hidden under a layer of snow, are a genuine feature of this terrain, and roped travel exists specifically to manage that risk. Your guide will typically lead, choosing a path that avoids the more obviously compromised sections of ice, and in some years a crevasse crossing will require a short aluminium ladder bridge, not unlike the ones used on the Khumbu Icefall, though considerably shorter and less exposed.
Walking roped on a glacier for the first time can feel strange. You're moving as a connected unit, matching pace with your teammates, and the ground under your feet looks deceptively solid even where it isn't. Trust your guide's chosen line, keep steady spacing on the rope, and resist the urge to wander off it to get a better photo. This stretch is not the hardest part of the day physically, but it demands consistent attention.
The Headwall
This is the section every article about Island Peak eventually circles back to, and for good reason. The final headwall is a stretch of steep snow and ice, commonly cited as running somewhere between 100 and 200 metres depending on the year and where exactly the fixed lines are anchored that season. Gradients on the steeper sections can approach 50 degrees, steep enough that you are almost entirely reliant on your jumar and the fixed rope rather than your own balance.
Ascending here is a matter of technique as much as strength. You slide the jumar up the rope, weight it, take a step, and repeat, using your legs to push rather than your arms to haul wherever possible, since arm strength alone burns out fast at altitude. Ice conditions vary noticeably by season. Hard, glassy ice demands precise, deliberate crampon placement and rewards climbers who move methodically rather than rushing. Softer, snow-covered ice is more forgiving on the feet but can be slower and more exhausting to move through, particularly if previous climbers have churned it up.
Traffic is a real factor here too. On busy weeks during peak season, you may find yourself waiting behind other teams at anchor points or bottlenecks, since there's often only a single strand of fixed rope in use at a time. Patience matters. Rushing past another team on a 45 degree ice slope is exactly the kind of decision that turns a manageable climb into a dangerous one.
The Summit Ridge
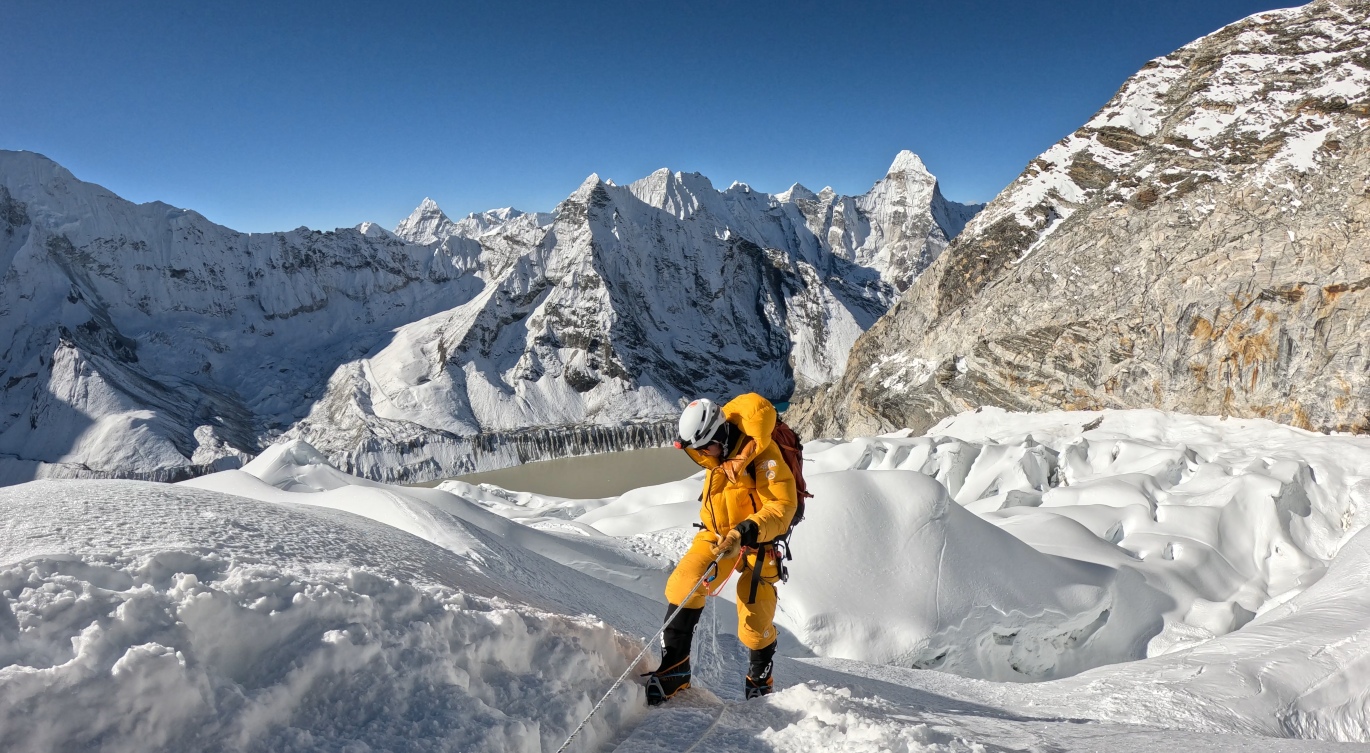
Above the headwall, the angle eases but the exposure increases. The final approach to the true summit runs along a narrow ridge with steep drops on either side, and there's rarely space for more than a handful of people to stand on top at once. Most guided teams limit summit time to a few minutes per group specifically because of how tight the space is, and because holding up the line behind you isn't fair to other climbers who've put in the same effort to get there.
The view from the top, when conditions cooperate, is one of the more striking rewards in Himalayan trekking peak climbing. Lhotse's south face rises directly behind you, close enough that its scale becomes almost overwhelming, while Everest itself, though technically visible, is often partially obscured by the sheer mass of Lhotse in the foreground. Ama Dablam's distinctive shape sits to the south, and on a clear morning the layered ridgelines of the wider Khumbu unfold in every direction.
The Descent
Getting down is its own challenge, and it's one that catches inexperienced climbers off guard more often than the ascent does. Descending the headwall usually involves an abseil or a controlled rappel down the fixed lines, which requires a different set of skills and a different kind of attention than the jumar ascent. Fatigue compounds here. You've already been moving for six to eight hours by the time you start heading down, and the temptation to rush the descent, particularly as the morning sun starts to soften the ice, is real. Most serious incidents on trekking peaks happen on the way down rather than the way up, simply because tired climbers make small mistakes on terrain that no longer feels as threatening as it did in the dark.
Back at base camp, most climbers describe a mix of complete exhaustion and genuine elation. It's a long day, often 10 to 14 hours door to door, and by the final hour most people are running on willpower more than energy. That's normal, and it's part of why proper conditioning beforehand matters so much. The climb rewards steady preparation far more than it rewards raw talent or a single burst of enthusiasm on the day itself.
Gear That Actually Matters for the Difficulty
Difficulty and equipment are closely linked on this climb, since a lot of what makes the headwall manageable comes down to having the right gear and knowing how to use it, rather than raw fitness alone. Most operators, including us, provide or arrange the specialised mountaineering equipment, but it's worth understanding what each piece does and why it matters.
-
Mountaineering boots rated for 6,000 metre peaks, such as the Scarpa Phantom or La Sportiva G2, which are stiff enough to take a crampon properly and insulated enough for the cold on summit night.
-
A climbing harness, used both for the fixed rope ascent and for clipping into anchors during rest breaks on the headwall.
-
A jumar, or mechanical ascender, which grips the fixed rope and slides upward but locks if you slip, making it the primary tool for the headwall climb.
-
An ice axe, used more for balance and self-arrest on the glacier approach than for the headwall itself, where the jumar does most of the work.
-
Crampons that fit your boots precisely, since a loose or poorly fitted crampon is one of the more common and entirely preventable causes of a stumble on the ice.
-
A helmet, essential given the risk of falling ice or rock, particularly in a crowded section where other climbers are moving above you.
-
Layered clothing suited to a wide temperature swing, since summit night can be bitterly cold while the descent in full sun a few hours later can feel surprisingly warm.
None of this equipment is exotic or hard to source through a guiding company, but comfort with it matters more than ownership of it. A single practice session with a harness and jumar before you leave home, even an hour at a local climbing gym, translates directly into confidence on the real headwall.
Common Mistakes That Make the Climb Harder Than It Needs to Be
Most of the difficulty climbers report afterward traces back to a handful of avoidable decisions made well before summit night. None of these are really about the mountain being harder than expected. They're about preparation gaps that the mountain simply exposes.
-
Compressing the itinerary to save a few days, which cuts into acclimatisation time and raises the odds of altitude sickness derailing the whole attempt.
-
Arriving with strong leg fitness but no upper body or core conditioning, then discovering on the headwall that hauling on a jumar uses muscles that trekking simply doesn't train.
-
Underestimating how cold summit night gets, and losing dexterity in cold hands right at the point where fine motor control on the jumar matters most.
-
Ignoring early symptoms of altitude sickness out of a reluctance to slow the group down, rather than communicating openly with the guide.
-
Skipping the base camp training session, or treating it casually, rather than using it to genuinely rehearse the exact movements needed on the wall.
Every one of these is fixable with a bit of foresight, and none of them require you to be an elite athlete. They simply require taking the preparation phase as seriously as the climb itself.
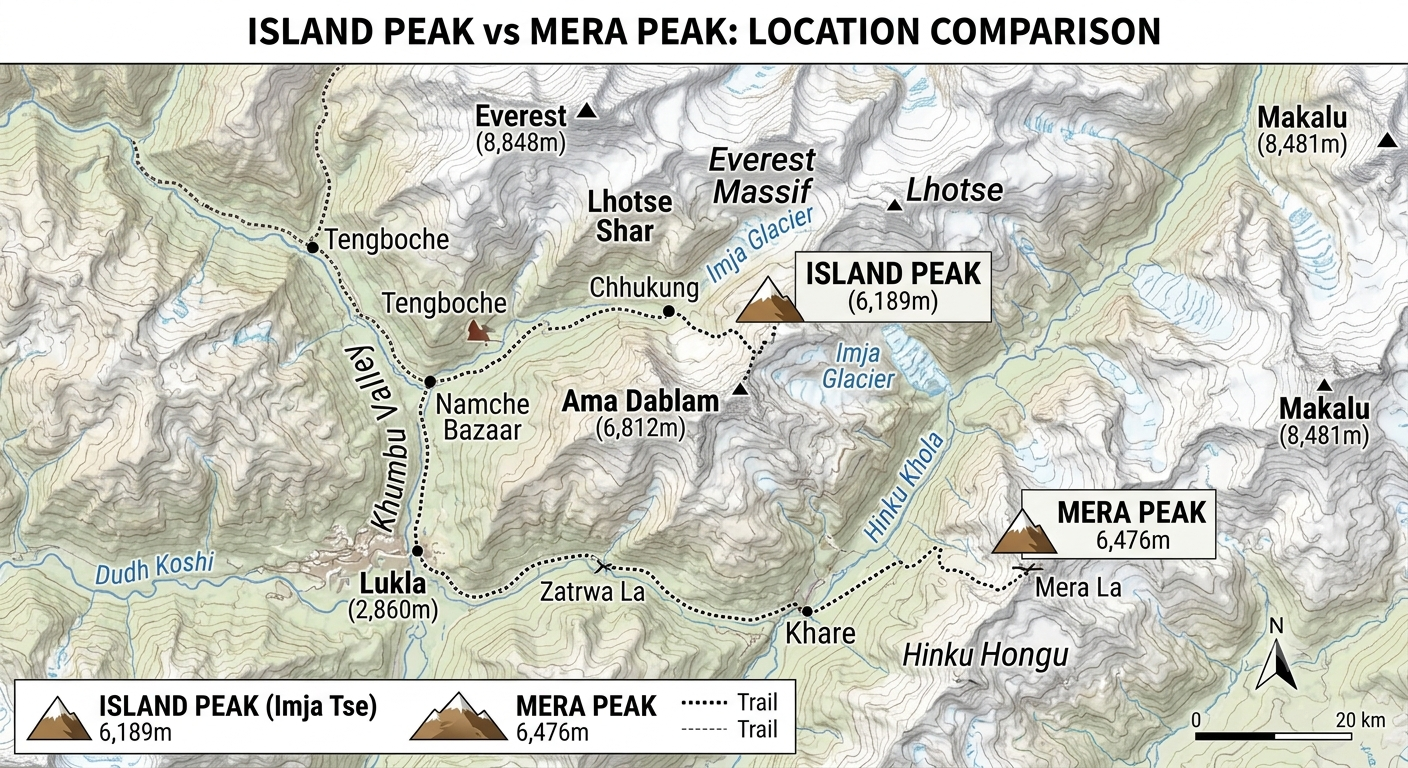
Island Peak vs Mera Peak: A Quick Difficulty Comparison
Because these two peaks sit so close together geographically and get compared constantly, it's worth putting the differences side by side. Mera Peak is higher, but the climb itself is a long, glaciated walk with very little technical rope work. Island Peak is lower but throws a genuinely technical obstacle at you near the top. If your main concern is altitude and stamina, Mera asks more of you. If your concern is comfort with exposure, ropes, and steep ground, Island Peak is the tougher of the two.
|
Factor |
Island Peak (Imja Tse) |
Mera Peak |
|
Altitude |
6,189 m (20,305 ft) |
6,476 m (21,247 ft) |
|
Alpine grade |
PD+ to Alpine 2B |
PD (Peu difficile) |
|
Technical demands |
Fixed rope headwall, crevasse crossings, jumar and ice axe work |
Mostly a long glacier walk, minimal rope work |
|
Summit day |
10 to 12 hours, steep final 100 to 150 metre wall |
10 to 12 hours, long but gentler gradient |
|
Best suited for |
Trekkers ready to add real climbing skills |
Trekkers wanting a high summit without technical climbing |
A number of climbers choose to do both in a single trip, often tackling Mera first as a way to build altitude tolerance before moving on to Island Peak's more technical terrain. It's a demanding combination and not one to take on without solid preparation, but it's a popular route for people building toward bigger Himalayan objectives down the line.
Why the Approach Trek Matters as Much as the Climb
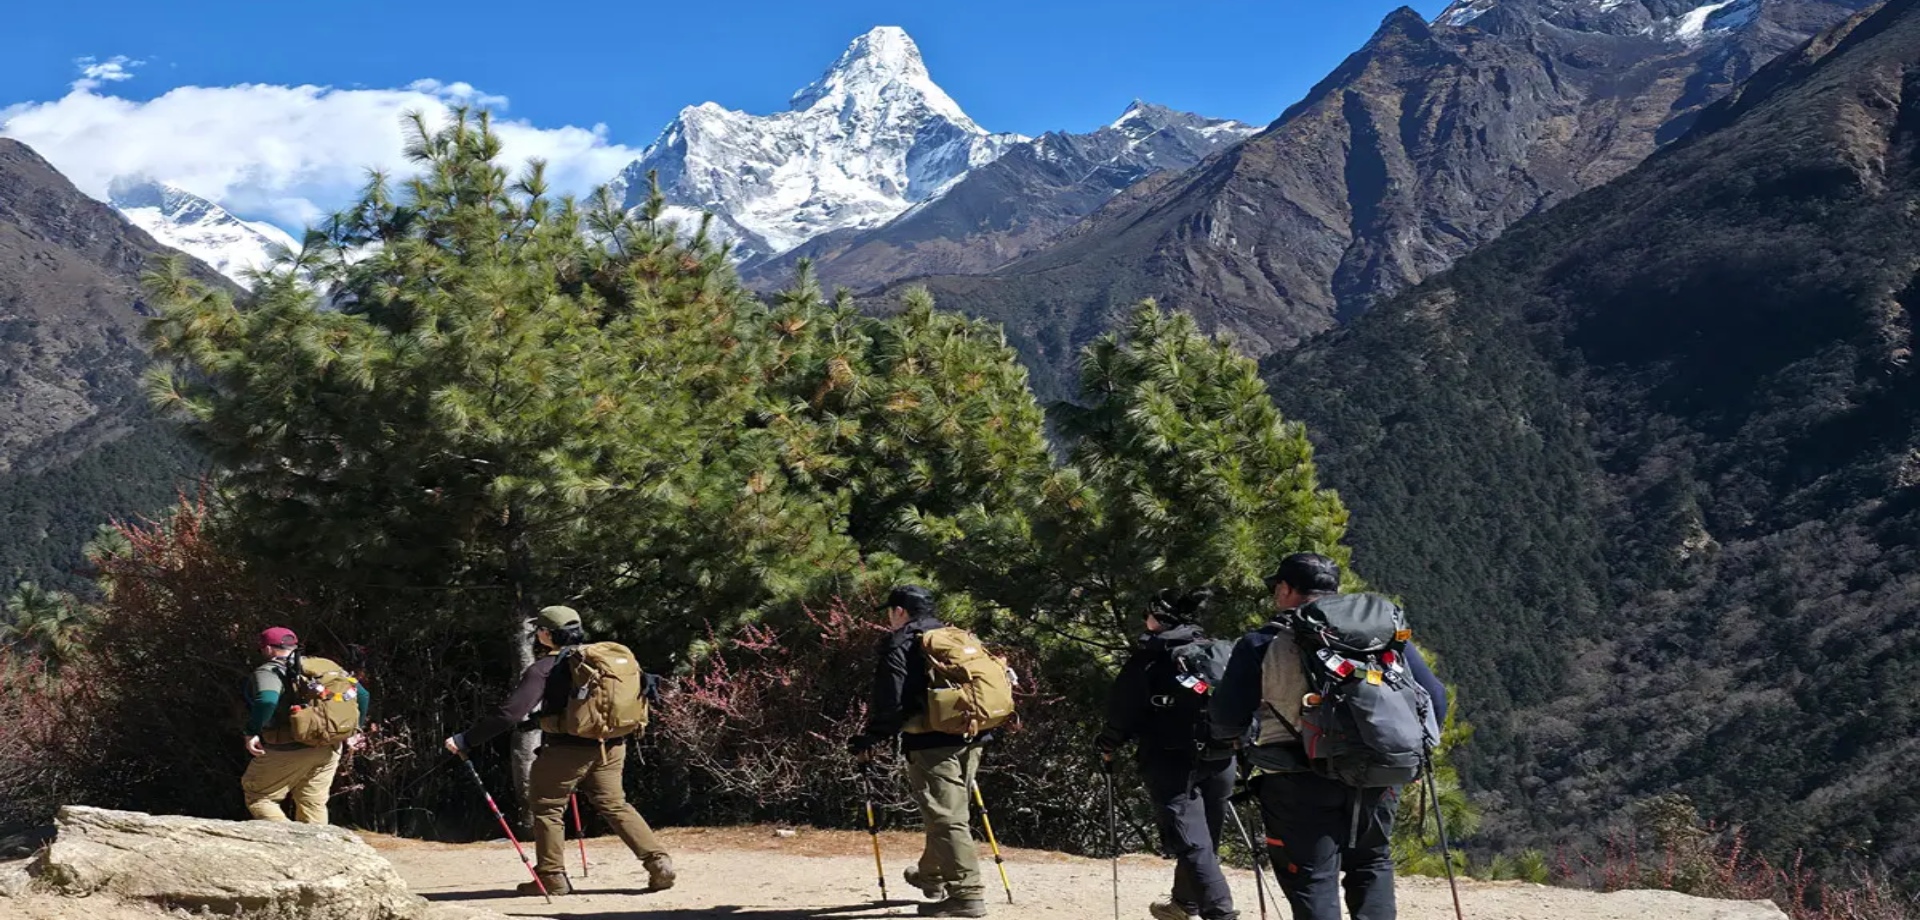
It's tempting to think of the days spent walking to base camp as simply the warm-up act before the real challenge begins. That framing undersells them badly. The approach trek, typically routed through Lukla, Namche Bazaar, Tengboche, and either Dingboche or Chhukung, is where your body actually does the work of acclimatising, and a rushed or poorly structured itinerary here is one of the most reliable ways to compromise your entire summit attempt before you've even reached the mountain.
A well-built schedule typically includes at least two dedicated acclimatisation days along the way, often at Namche and again at Dingboche or Chhukung, built around the well-established principle of climbing high and sleeping low. These aren't rest days in the sense of doing nothing. They usually involve a shorter hike up to a higher viewpoint before returning to sleep at a lower elevation, which helps your body adjust gradually rather than being thrown straight into thinner air overnight. Skipping or shortening these days to save time on an itinerary is one of the more common ways a trip goes wrong, and it has nothing to do with how fit you are. Altitude adjustment happens on a physiological timeline that fitness alone cannot speed up.
Most standard itineraries run somewhere between 15 and 19 days total, door to door, and that length isn't arbitrary padding. It reflects the time genuinely needed to move through the Khumbu safely, adjust to the altitude in stages, reach base camp in reasonable condition, and still have a weather buffer built in for the summit attempt itself, since poor conditions can force a delay of a day or two. Climbers who arrive having compressed this timeline to fit a tighter work schedule are, more often than not, the ones who struggle hardest on summit night, regardless of how many hours they logged on a treadmill beforehand.
The Mental Side of the Climb
Physical conditioning gets most of the attention in articles like this one, but the mental side of Island Peak deserves just as much consideration. Summit night involves hours of movement in the dark, often in bitter cold, frequently while genuinely tired, and it's easy to underestimate how much that combination wears on morale rather than muscles.
The headwall in particular tends to be more intimidating in anticipation than in the moment. Climbers who've never used a jumar before often build it up mentally into something far more dangerous than it actually is, when in practice, once you're clipped in and moving, the mechanics of the system do most of the work of keeping you safe. The bigger mental challenge tends to be patience, both with your own pace and with the inevitable waiting around bottlenecks or shared anchor points, particularly during busy weeks in peak season.
It also helps enormously to trust your guide's judgment on the day. Conditions on a mountain like this shift, sometimes within hours, and a call to slow down, wait, or in rare cases turn back isn't a failure of the climber's ability. It's simply good mountaineering practice, and climbers who've mentally prepared for that possibility ahead of time tend to handle it far better than those who treat the summit as a guaranteed outcome rather than a genuine, weather-dependent objective.
Who Tends to Struggle, and Why
In our experience, the climbers who have the hardest time on Island Peak generally fall into one of a few patterns. None of these are about age or raw athletic ability. They're almost always about preparation and expectations.
-
Trekkers with strong cardio but no experience wearing crampons or handling a jumar, who find the headwall mentally unsettling simply because the movements feel unfamiliar.
-
Climbers who treat the approach trek casually, assuming the real challenge only starts at base camp, and arrive under-acclimatised as a result.
-
People who underestimate how cold and how long summit night actually is, and end up fighting fatigue and cold hands during the section that most needs steady technique.
-
Climbers who skip upper body and core conditioning entirely, assuming that leg fitness from trekking will be enough to haul themselves up a fixed line.
None of these are disqualifying on their own. They're simply the gaps that show up most often, and every one of them can be closed with a few months of targeted preparation.
How to Train for Island Peak
Three months of focused preparation is a reasonable minimum for most people coming from an average fitness baseline. The goal isn't to turn yourself into a technical ice climber before you arrive. It's to build the cardiovascular base and upper body strength that make the headwall feel like a manageable challenge rather than a shock to the system.
Cardiovascular Endurance
Long hikes with a loaded pack are the single best preparation you can do, ideally on varied terrain with real elevation gain. If you don't have hills nearby, stair climbing machines or repeated stair sets in a loaded pack come close. Aim to build toward being comfortable moving for five to eight hours at a stretch, since that's roughly what a long trekking day or summit push demands.
Strength and Stability
Because the headwall involves pulling your own body weight up a fixed line, some upper body and core work goes a long way. Pull-ups, rows, and general core stability exercises translate directly to jumar work. Balance training matters too. You'll be moving on uneven, sometimes narrow terrain wearing crampons, and a stable base makes every step on the glacier feel more secure.
Practice With the Actual Gear
If you can get even a single session with crampons and an ice axe before your trip, whether that's an indoor ice wall, a dry tooling gym, or a guided day out on real terrain, it will make an enormous difference to your comfort level on summit night. Most climbers arrive without this and manage fine thanks to the base camp training session, but familiarity beats first-time exposure every time, especially in the dark at altitude.
Timing Also Shapes the Difficulty
The two main climbing windows are spring, running roughly April into May, and autumn, running October into November. Both offer stable weather and established fixed lines, though each brings a slightly different flavour of difficulty. Spring often means harder, more consolidated ice on the headwall, which rewards good crampon technique. Autumn tends to bring softer snow conditions post-monsoon, which can be more forgiving underfoot but sometimes slower going. Climbing outside these windows is possible but significantly colder and less predictable, and most operators, including us, steer climbers toward these two seasons for good reason.
Permits, Guides, and Why You Can't Do This Solo
Unlike a standard trek, Island Peak requires a dedicated climbing permit issued by the Nepal Mountaineering Association, in addition to the usual Sagarmatha National Park permit and TIMS card. A licensed climbing guide is mandatory, not optional, and this isn't just a bureaucratic requirement. The fixed rope sections, the crevasse crossings, and the judgment calls around changing ice conditions all benefit enormously from someone who has been up that headwall dozens of times and knows exactly how it's behaving that particular week.
We build in a full training day at base camp before any summit attempt specifically so that everyone in the group, regardless of prior experience, has practiced the exact movements they'll need on the real climb. It's not a substitute for months of fitness work at home, but it closes the gap between reading about jumar technique and actually doing it under supervision.
So, Is Island Peak Right for You?
If you're a fit trekker who has completed a demanding multi-day trek before, such as Everest Base Camp, and you're comfortable with the idea of learning basic rope and ice technique along the way, Island Peak is a realistic and achievable goal. It is not a climb to take lightly, and it's not something to attempt without proper acclimatisation and a genuine base of physical conditioning. But it also isn't reserved for elite mountaineers. It sits in a sweet spot that has made it, for decades, one of the most popular introductions to real Himalayan climbing anywhere in Nepal.
The honest summary is this: expect a demanding trek to get there, a long and tiring summit night, and one genuinely technical section that will ask something new of you. Prepare for all three, and the mountain tends to reward the effort with one of the more memorable summits in the entire Khumbu region.
Thinking about attempting Island Peak? We'd be glad to walk you through route options, training advice, and the right season for your schedule.
Frequently Asked Questions
Yes, for many people it is. Prior mountaineering experience helps but isn't strictly required, since guiding teams provide hands-on training with crampons, ice axes, and jumars at base camp before the summit attempt. What matters more is a solid trekking background and genuine physical fitness.
No, though it's an advantage if you have it. Most climbers arrive having only trekked before, and the pre-summit training session is designed to bridge that gap. What you can't skip is physical preparation, since fitness matters more than prior technical exposure.
Most teams budget 10 to 14 hours round trip from base camp, starting well before dawn. The exact time depends on group size, conditions on the headwall, and how busy the fixed lines are that day.
The final headwall, typically somewhere between 100 and 200 metres of steep snow and ice just below the summit ridge. It requires fixed rope technique, a jumar, and comfort with some exposure, and it's the section that defines the climb's difficulty rating.
Technically, yes. Island Peak involves rope work, crevasse crossings, and a steep headwall that Mera Peak simply doesn't have. Mera Peak is higher in elevation and demands more raw stamina, but its climbing sections are far less technical.
Acute Mountain Sickness is a real risk on any trek or climb above 4,000 metres, and Island Peak's base camp sits above 5,000 metres. A gradual itinerary with proper rest days, staying hydrated, and being honest with your guide about symptoms are the best defenses. Climbing higher too fast is the most common cause of serious problems, not the technical difficulty of the route itself.
It helps, but it isn't mandatory. Guides run a training session at base camp covering exactly the skills you'll need. If you can get even one practice session before your trip, whether at an indoor wall or on a guided outing, it will make summit night feel considerably less unfamiliar.
Spring, from April into May, and autumn, from October into November, are the two established windows. Both offer more stable weather and set fixed lines, though the ice conditions on the headwall can differ noticeably between the two seasons.
You should be comfortable trekking five to eight hours a day over multiple consecutive days, ideally with some hill or stair training beforehand. Adding upper body and core strength work in the months before your trip specifically helps with the jumar and rope sections near the summit.
A licensed guide is mandatory under current permit requirements, and for good reason. Conditions on the headwall shift throughout the season, and having someone experienced managing the fixed lines and reading the ice makes a meaningful difference to safety.
You'll need a climbing permit issued through the Nepal Mountaineering Association, along with the standard Sagarmatha National Park entry permit and a TIMS card. These are typically arranged as part of a guided package rather than something climbers source individually.
Yes, this is one of the more popular combinations, since the approach trail overlaps with the standard Everest Base Camp route for much of the way. It adds acclimatisation days and lets you experience the wider Khumbu region before turning off toward Chhukung and the Island Peak base camp.
About Accessible Adventure
Bringing unforgettable Himalayan adventures to everyone. Our expert guides and carefully curated experiences ensure that everyone can explore the beauty of Nepal, Tibet, and Bhutan.
Learn More